Spectral Snub
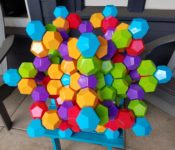
Here’s an image from inside one of a pair of mirror-image snub dodecahedra built by passersby on the Harvard Science center plaza in 2019 April.
Read More

Here’s an image from inside one of a pair of mirror-image snub dodecahedra built by passersby on the Harvard Science center plaza in 2019 April.
Read More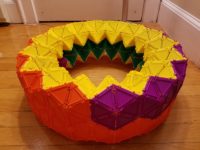
Here’s a torus built from equilateral-triangle Geometiles that I used as a prop for an undergraduate talk at Harvard University in the Fall semester of 2018.
Read More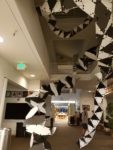
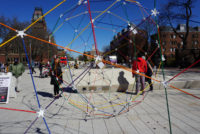
This is a placeholder post for pictures of an installation I led on 2018 Oct 21 at the Mathematical Sciences Research Institute, entitled “Tetrahelix”. It consisted of a double helix, one strand of which was composed entirely of regular tetrahedra connected face-to-face (such compounds can reach any point in space and come arbitrarily close to closing in a loop but can never make a mathematically perfect loop), and the other strand of which was the combinatorial dual of the first, realized by a geometric structure that can only be thought of as a “polyhedron” in a relaxed way. When I get a chance, I will post the construction techniques and math behind this installation.
Read More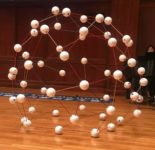
Here’s a a student-built snub dodecahedron that resulted from a session I led in July 2018 at The College of New Jersey. It uses the classic “marshmallow and toothpick” construction technique, just with styrofoam balls in place of the marshmallows and 1/8″ diameter dowels in place of the toothpicks.
Read More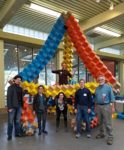
At last the day came for the installation of the Boxtahedral Tower at the Golden Gate Stem Fair. Below is our materials list and a picture of them waiting to be set up.
Read MoreSo far, we’ve created a lot of interesting small models of tensegrity structures. However, for doing public programs of the sort Storm King Art Center was planning, it’s always helpful to be able to build much larger models of things. Building giant models seems to get the ideas across more vividly, engage visitors more thoroughly, and be just plain fun.
Read More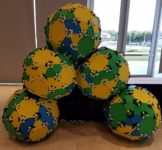
Here’s a closeup of some snub dodecahedra that students built as part of a group construction I led at The College of New Jersey in July of 2017. They are each approximately 80cm in diameter.
Read More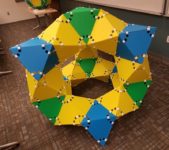
Here are two large-scale group constructions I facilitated the construction of as part of a session at a 2017 MAA Spring Sectional meeting at Frostburg University. The first is the one I have dubbed the “Octahex Ring” — it’s a compound of a dozen octahedra:
Read More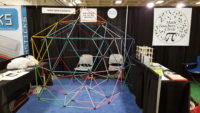
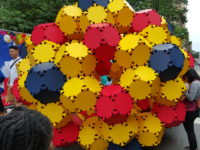
Here’s an installation I designed for the National Museum of Mathematics for the 2016 USA Science and Engineering Festival in Washington DC. The only construction materials are dowels, off-the-shelf end caps, and zip ties. It’s not actually a fully elevated icosidodecahedron; only the pentagonal faces are elevated.
Read More
A picture from the top of the Flatiron Building in Manhattan, NY of an installation I designed for the National Museum of Mathematics for an observation of the winter solstice. It was geometrically appropriate, in a way, because the highest angle the sun reaches in the sky on the winter solstice is quite close to the vertex angle of the regular heptagram approximated by the arrangement of lights in the photo.
Read More