Planning TOWARD
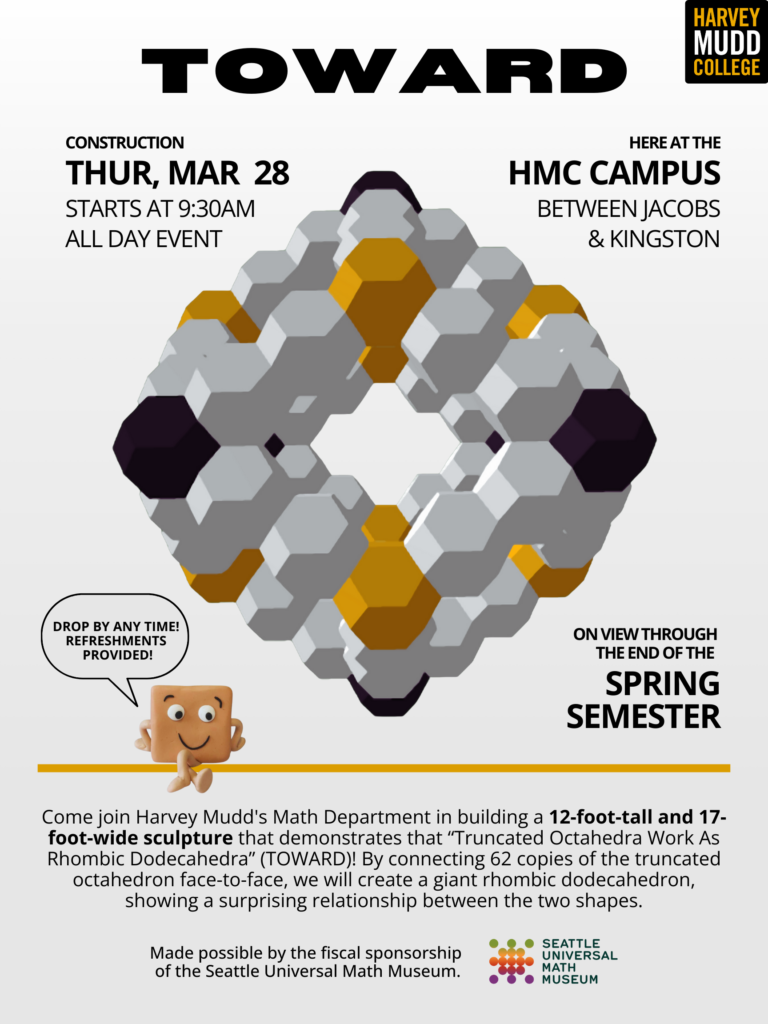
Because TOs Work As a RD, Studio Infinity’s next project has officially been dubbed TOWARD! We are collaborating with Peter Kagey, a Visiting Assistant Professor of Mathematics at Harvey Mudd College, who found the TO particularly appealing due to its double life as a permutohedron. The build will take place at Harvey Mudd College, so we’re opting to use Harvey Mudd’s black, white, and gold as our palette. Here’s our poster for the event, featuring a digital mock-up of what we intend to build:

With a model in mind for our sculpture, it’s time to choose materials and a construction system. While it might eventually be housed indoors, we are building it outdoors and there is a possibility it could remain outdoors for a month or more. For that reason, we want something sturdy enough that a gust of wind wouldn’t bat it around. While DodecaRT and some similar past projects were made of corrugated plastic, we looked into aluminum and have decided on an Alumanate composite often used in sign-making.
The composite comes in sheets, so there’s a question of how to use it efficiently. It looks to cut the TOs out as flat half-nets to be folded and zip-tied into hemispheres. Two hemispheres can then be combined into a TO with Velcro straps, making it convenient to disassemble the sculpture later, transporting it and storing it as nested hemispheres. The TOs will be connected directly face-to-face using plastic rivets and binder clips, a decision made after toying with the idea of a “floating” face-to-face connection using turnbuckles as connector-spacers.
Since the hemispheres need to stack for transport and storage, here’s one of the few good half-net candidates that (fortunately) turns out to be one of the more efficient options to cut from a rectangular sheet:

Choosing the sizes of the TOs comes down to a tug-of-war between wanting to fit as many half-nets as possible on each sheet of Alumanate composite and wanting large TOs. It looks like we will have to go with a 25cm edge length for our TO, since that’s about the largest size at which we can fit two half-nets per 4′ by 8′ sheet, leaving reasonable margins. There is some unused real estate, which we will use to cut components for a later project — stay tuned for that!
When designing the specs for cutting the half-nets, we also need to include holes for rivets and slits for zip ties and Velcro straps. Since it will be important for the assemblers to figure out how to fit the TOs together, we’re also going to cut some alignment symbols right into the units. And to reduce weight, provide windows for assemblers to reach into the TOs, and give a site for face-to-face binder clipping, we will cut “windows” in every face.
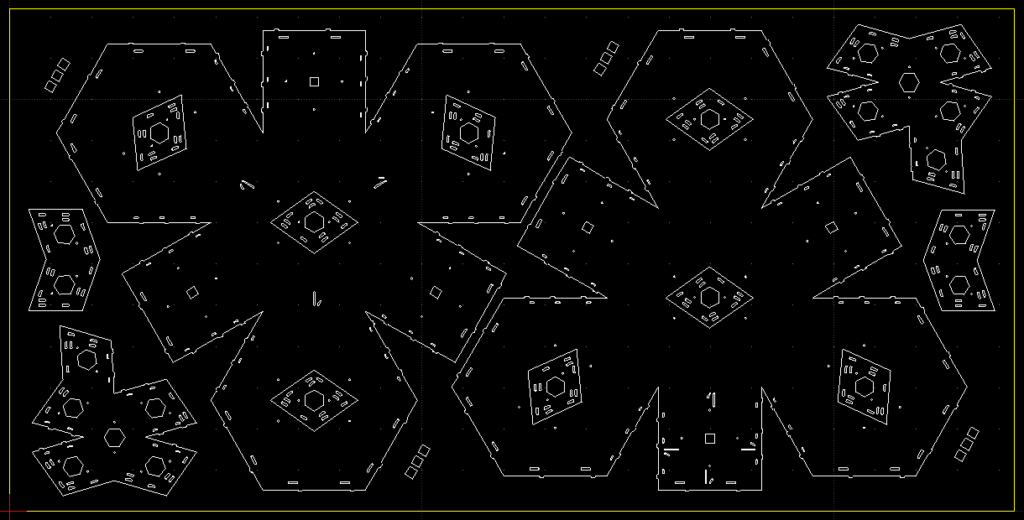
Here’s our final cut file:

Note the left and right halves are slightly different. This will allow the units to be linked (with some care!) so that the two rhombi at interfaces always align. Arrows point to faces that should be used for links on degree-3 or degree-4 vertex units.
If you would like to use these plans to cut your own half-nets or make modifications to our design, you are more than welcome! Download TOWARDfinal.dxf to get started. (You’ll need a CAD program like LibreCAD or many others to edit it.)

