

Woven SSD
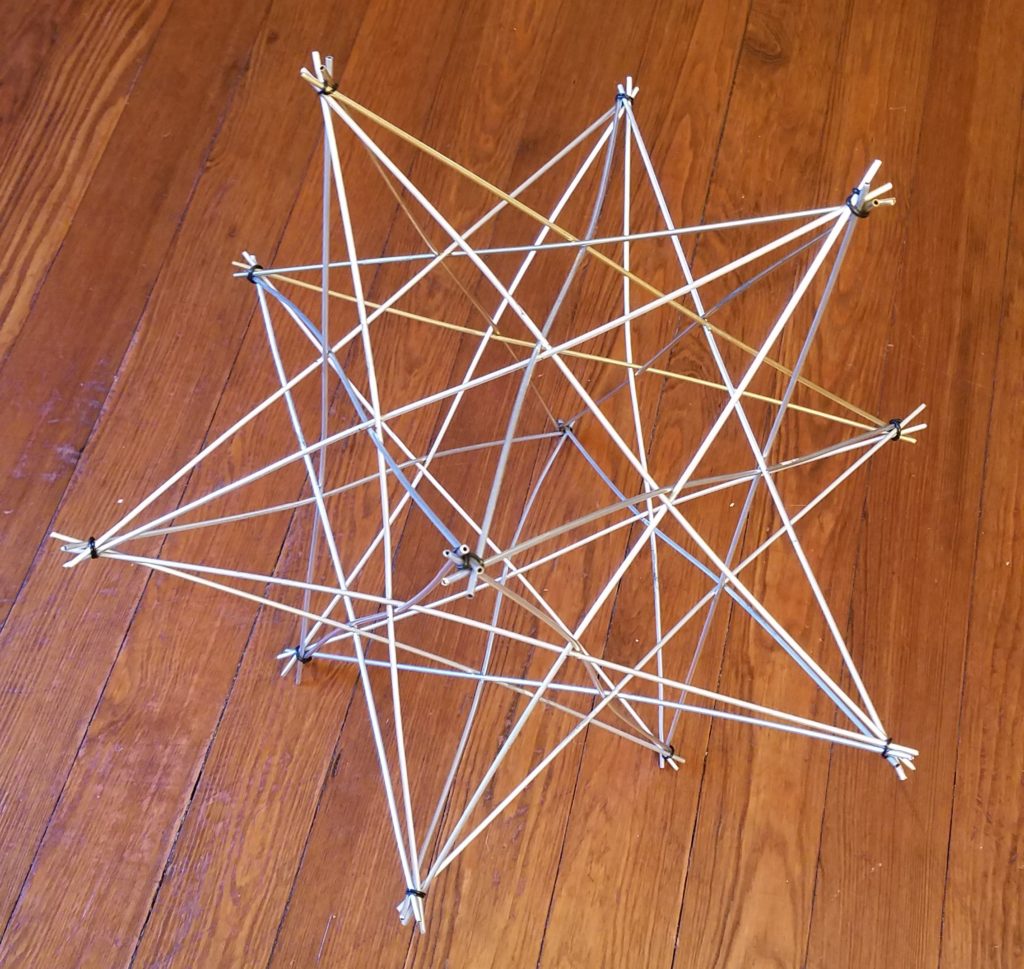
It’s high time that S∞ got back to its core: mathematical constructions you can build. Here’s an attractive star-shaped polyhedron made with a weaving technique that I am indebted to Jürgen Richter-Gebert for introducing me to.
It’s called the “small stellated dodecahedron,” and is one of the Kepler-Poinsot regular polyhedra. (Unlike the usual five Platonic solids, its edges intersect each other at points besides the twelve vertices.) We’ll call it the “SSD” for short.
| Materials | Tools |
|---|---|
| 30 equal-length rods | Scissors |
| 32 rubber bands | |
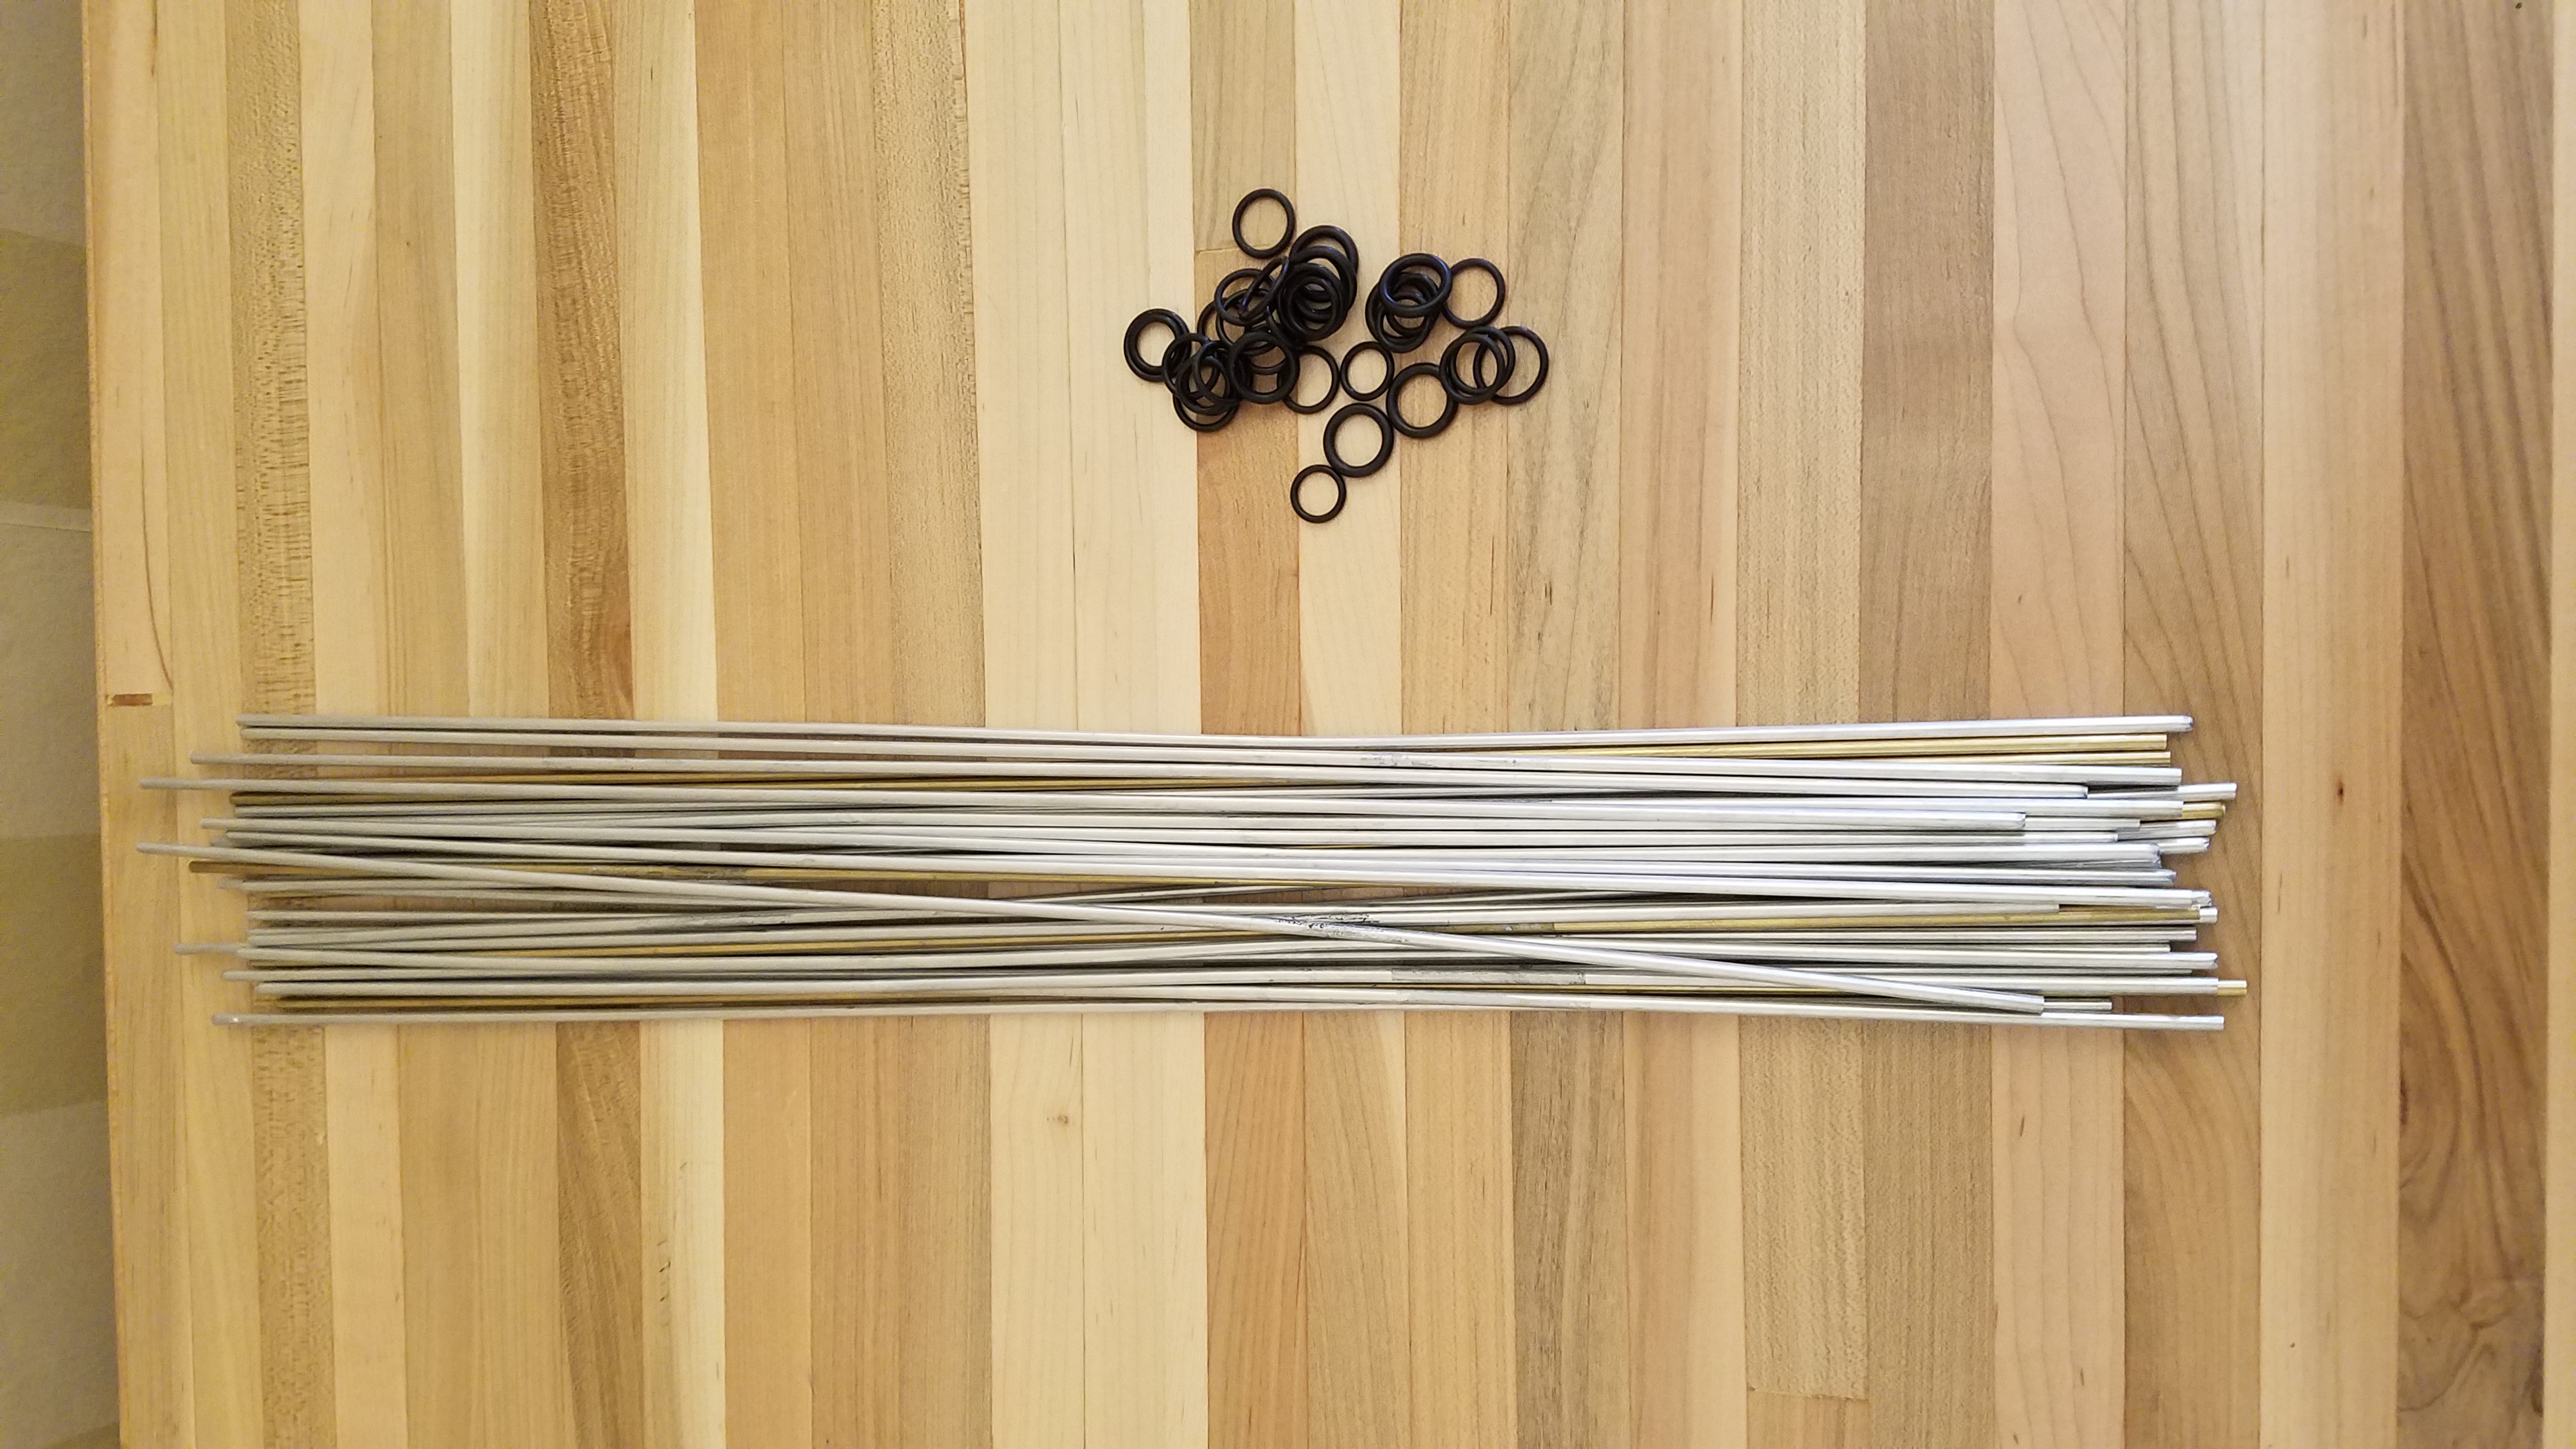 | |
To build this, you first need 30 rods all the same length, made of some material that has a bit of give (hint: not glass rods). You can choose almost any material; here, I’ve used mostly aluminum tubes, with five contrasting brass tubes of the same diameter to highlight the first star you make. Possibilities include thin dowels, bamboo strips, pipe cleaners, and more.
You also need 32 rubber bands. They should be sized so that it’s easy enough to get them around five rods simultaneously, but then they should hold that thickness of material securely (of course you can double or triple up the bands if need be). You can use almost any type of elastic bands: ordinary office rubber bands, colored hair elastics, or rubber O-rings as I’ve used here.
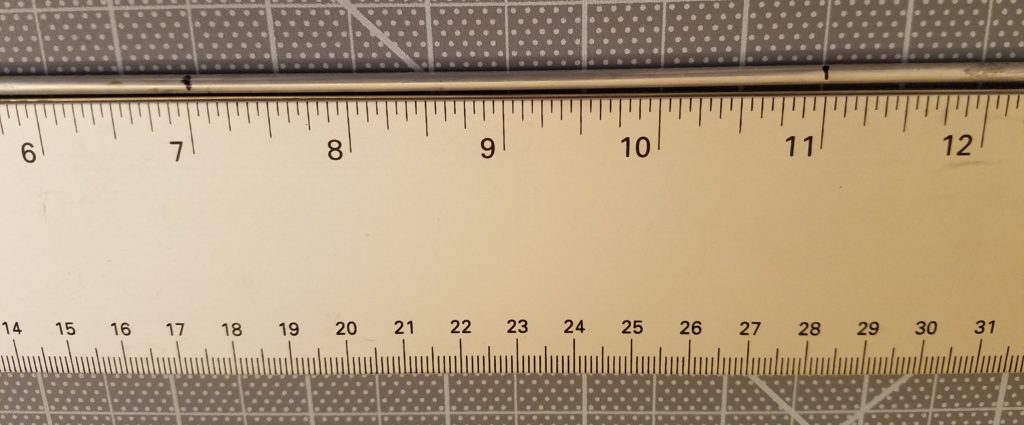
Before you get started assembling the SSD, you should mark the locations that the rubber bands will go on each rod. To find these locations, first pick an amount of each rod that will extend past each vertex for security of the connections. For example, I used 18-inch rods, so I chose that the rods would extend 1/2 inch past each vertex. If you are making a larger version, you’d want to pick something longer; if you are making a smaller SSD, I wouldn’t go much below 1/2 inch because the vertex connections might start slipping apart too easily.
Subtract twice the amount you are leaving at the vertices from the length of the rods to get the distance between the vertices. In my case, that’s 18 – 2×(1/2) = 17 inches. Now multiply this value by 2/(3+√5); for 17 inches, this gives about 6.49 inches. (See the MathStream post that explains this calculation.) Finally add back in the amount you’re leaving at the vertices; this step gives me 6.99 inches, which we should of course round to 7 inches. That’s the distance you want to mark on the rods from each end (two marks per rod). With my 18-inch rods, I just lay them next to a ruler and mark at 7 and 11 inches.
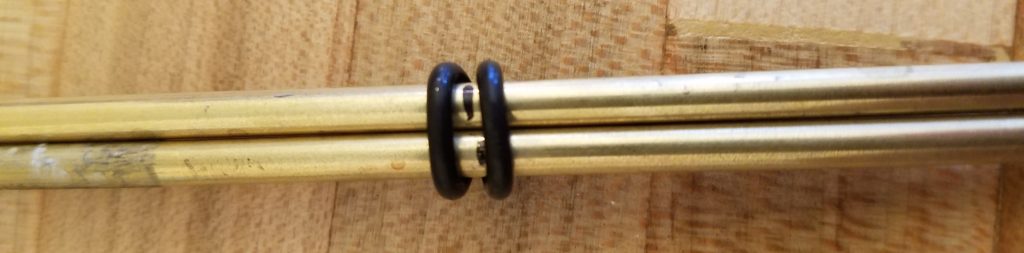
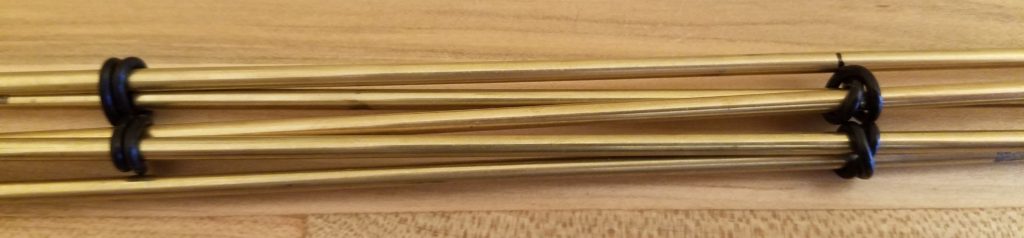
Ok, now all is ready for construction. The basic step you’ll be doing over and over is placing two rods side-by-side and putting a rubber band around both of them and sliding it down to the first mark on the rods.
We’ll call this basic unit a “linked pair.” Take two linked pairs and put them side by side with their connections on the same side, and put a third rubber band around one rod from each pair at the ends opposite the existing connections. Slide the rubber band down so that you have a zig-zag chain of four rods.

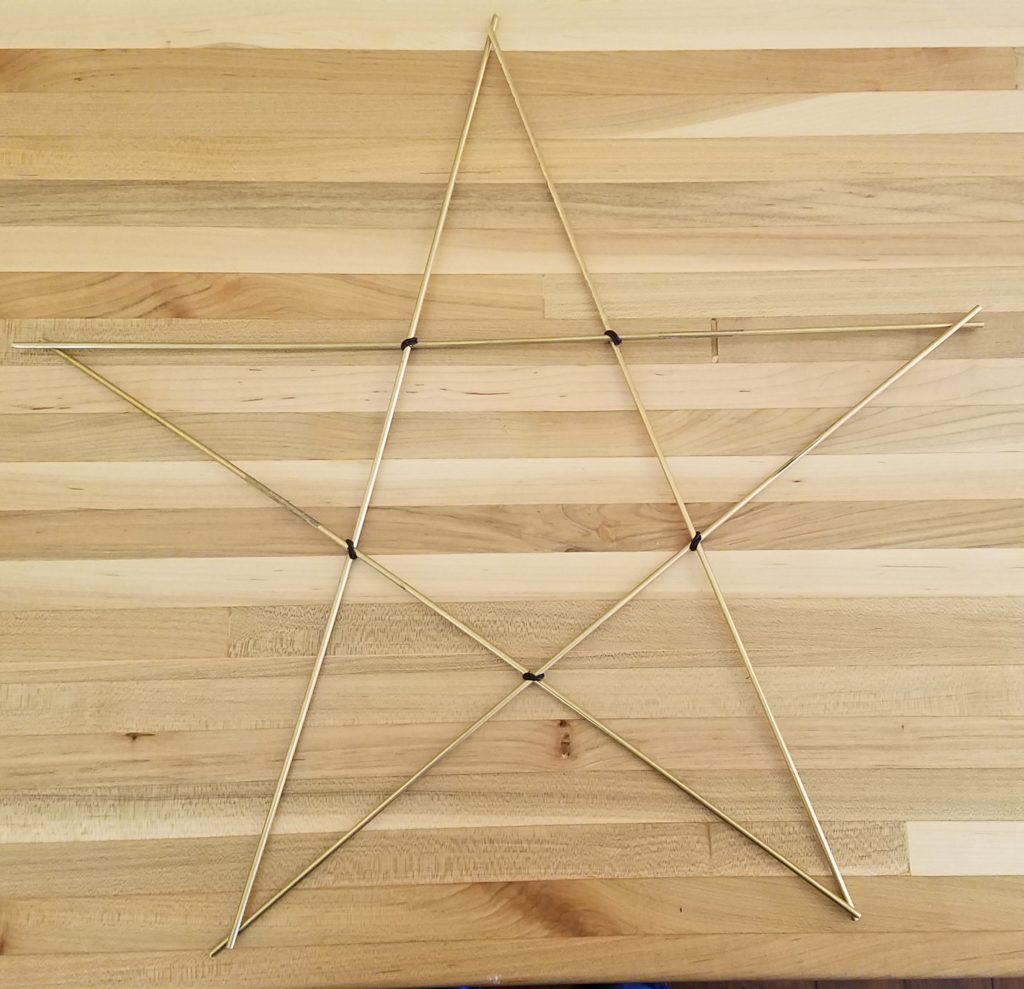
Connect a fifth rod to one at either side, continuing the zig-zag.
Now connect the free end of this fifth rod to the free end of the first rod of the zig-zag, as shown on the right.
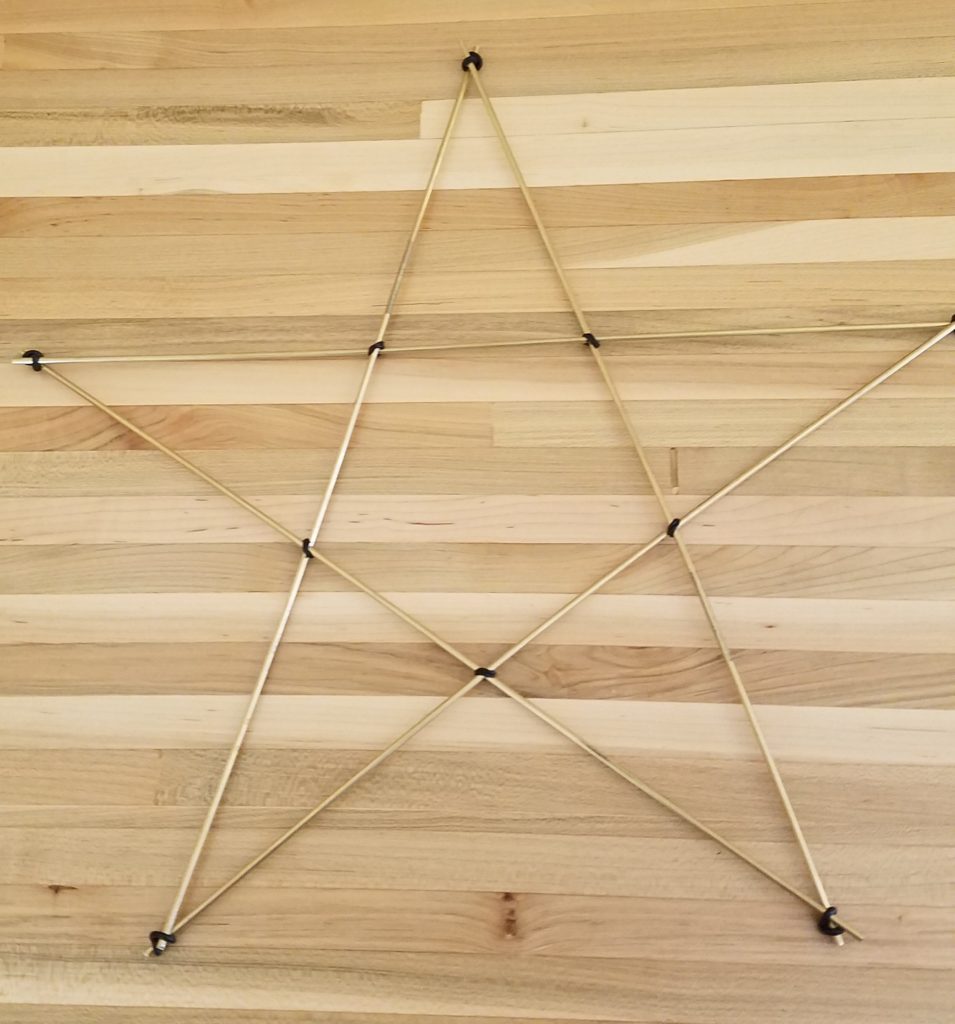
This is a configuration that you can now wiggle around until it forms a five-pointed star, as shown to the left. Important: looking at the two junctions on each rod, the rod must be underneath at the first junction and on top at the second junction as you proceed clockwise around the inner pentagon. Make sure that every one of the five rods follows this pattern before continuing, It’s this under-over, under-over pattern that constitutes the weaving in this construction, and that same under-over, under-over will continue throughout the entire construction.
Next, at each of the points of the star you’re forming, you can slip one rod under the other to continue the under-over junction pattern of the rods. These points of the star will eventually be vertices of the SSD.
Add a rubber band to secure each of the points, and congratulations, you’ve just made your first star out of 12.
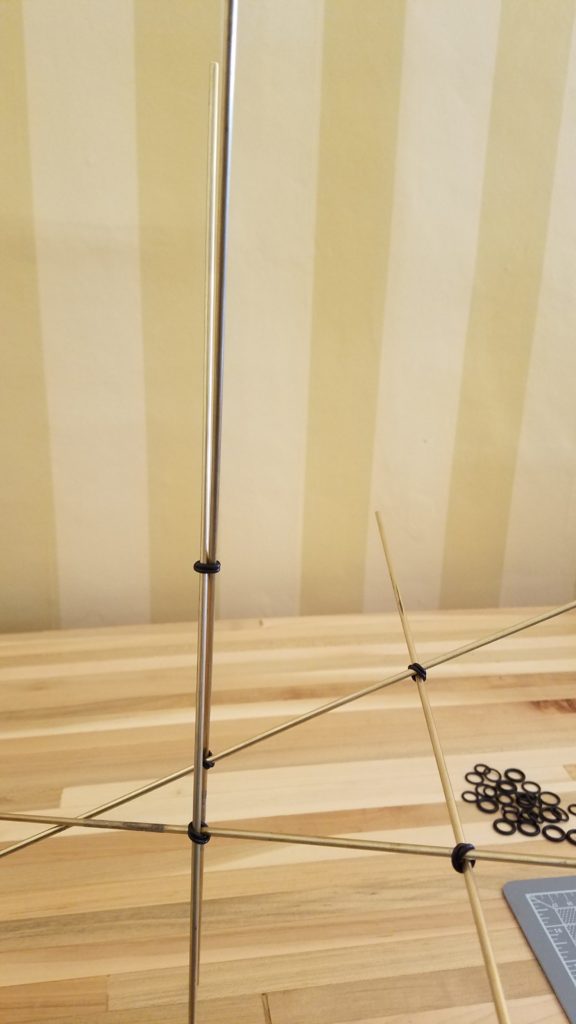
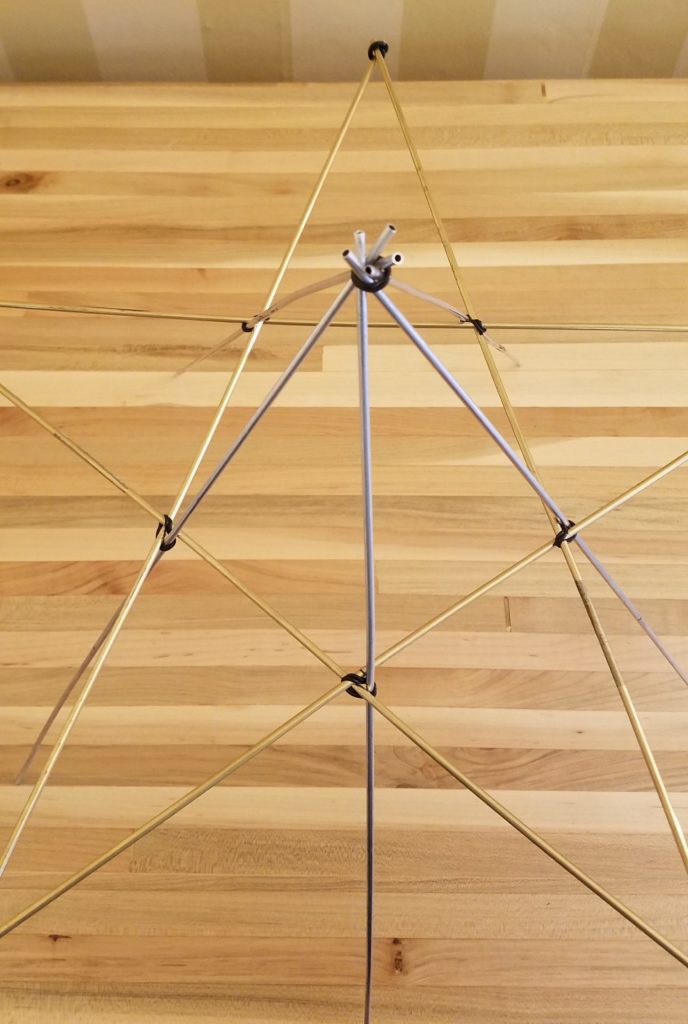
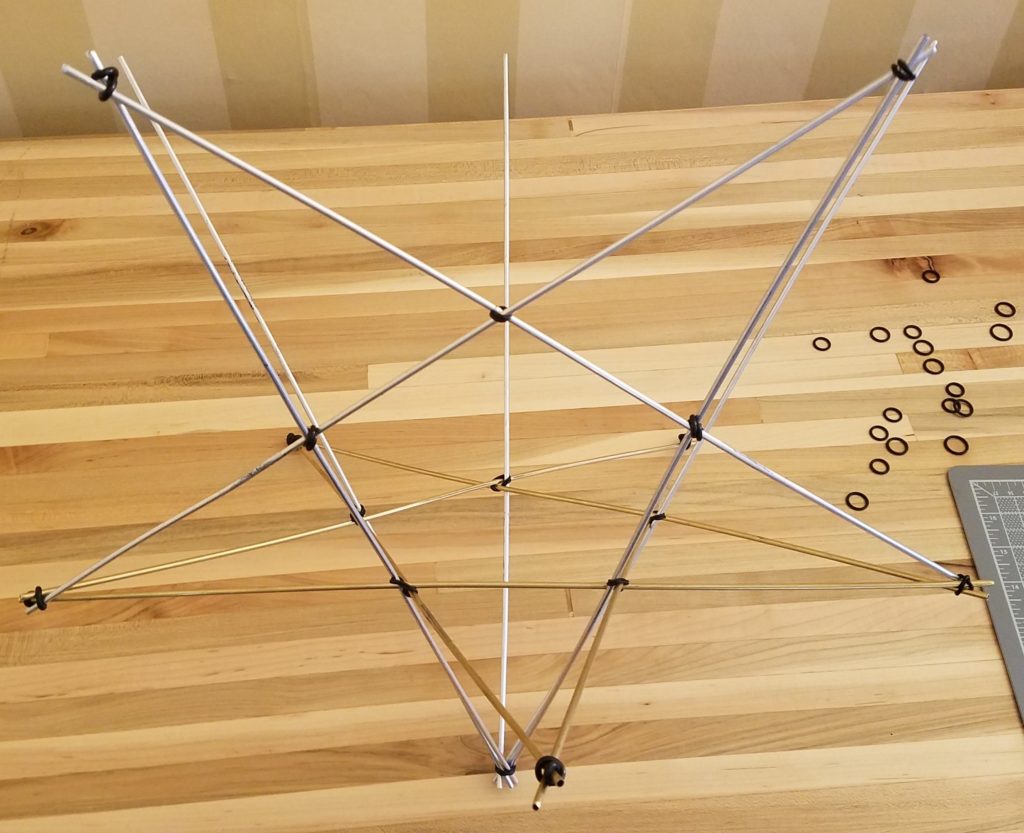
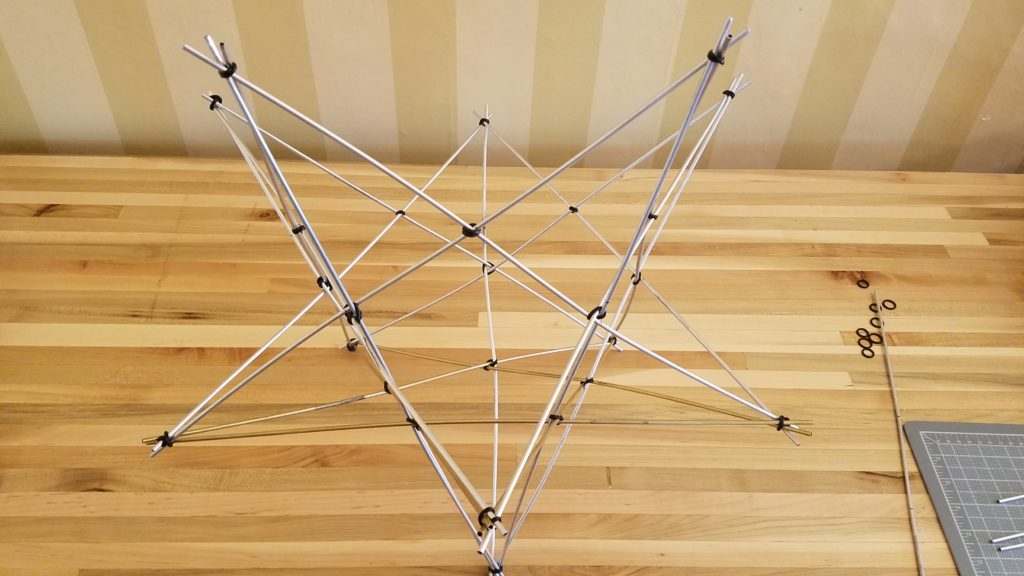
To continue toward the SSD, take five rods and line them all up and put a rubber band around all five of them and slide it down just a short way, roughly the amount you decided to leave at the vertices above. You should then be able to splay the rods out so that the far ends are at the points of a pentagon, and there is a little clockwise swirl of the near ends of the rods (see the picture to the right).
Place each of the far ends just counterclockwise of one of the internal junctions of the star you made, in order around the star (as shown on the left).
Insert each of the far ends into the rubber band at the corresponding junction, making sure to keep it within the triangle of the star that it started in.
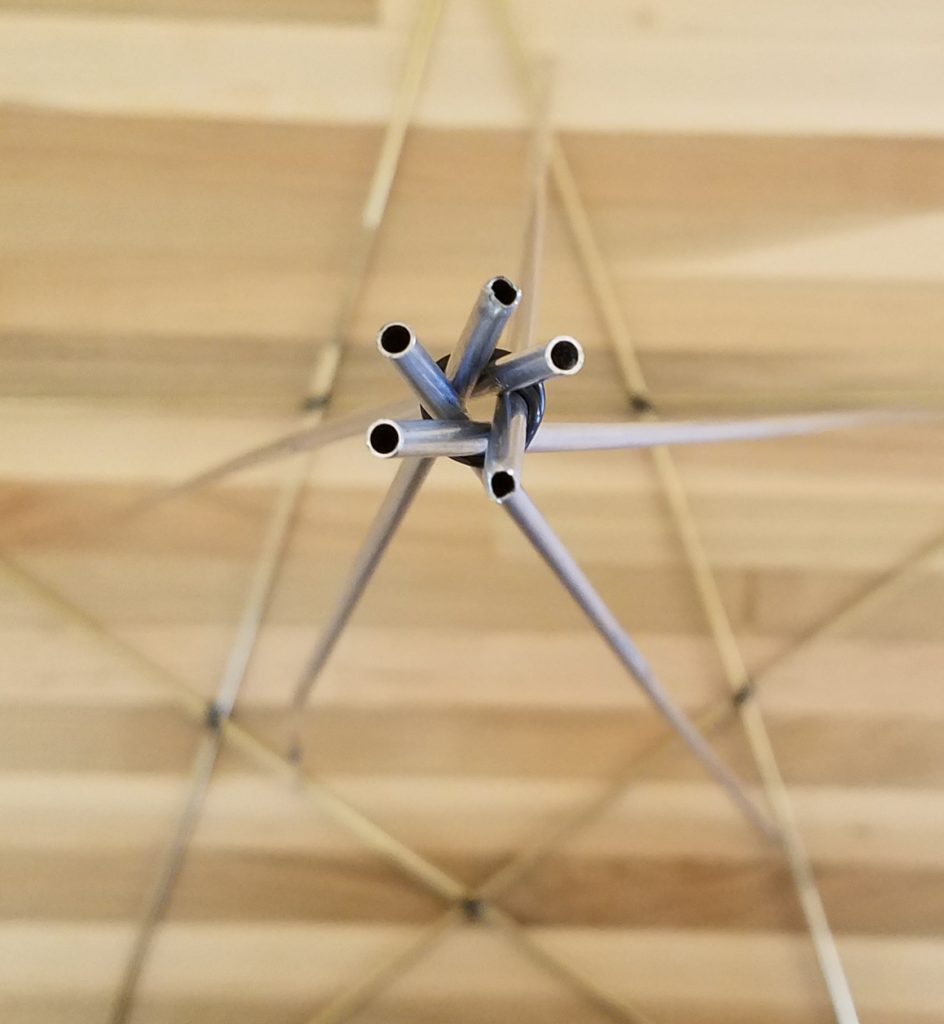
Now push all of the five new rods through those junctions until the second mark reaches the junction. That completes the first full vertex of your SSD.
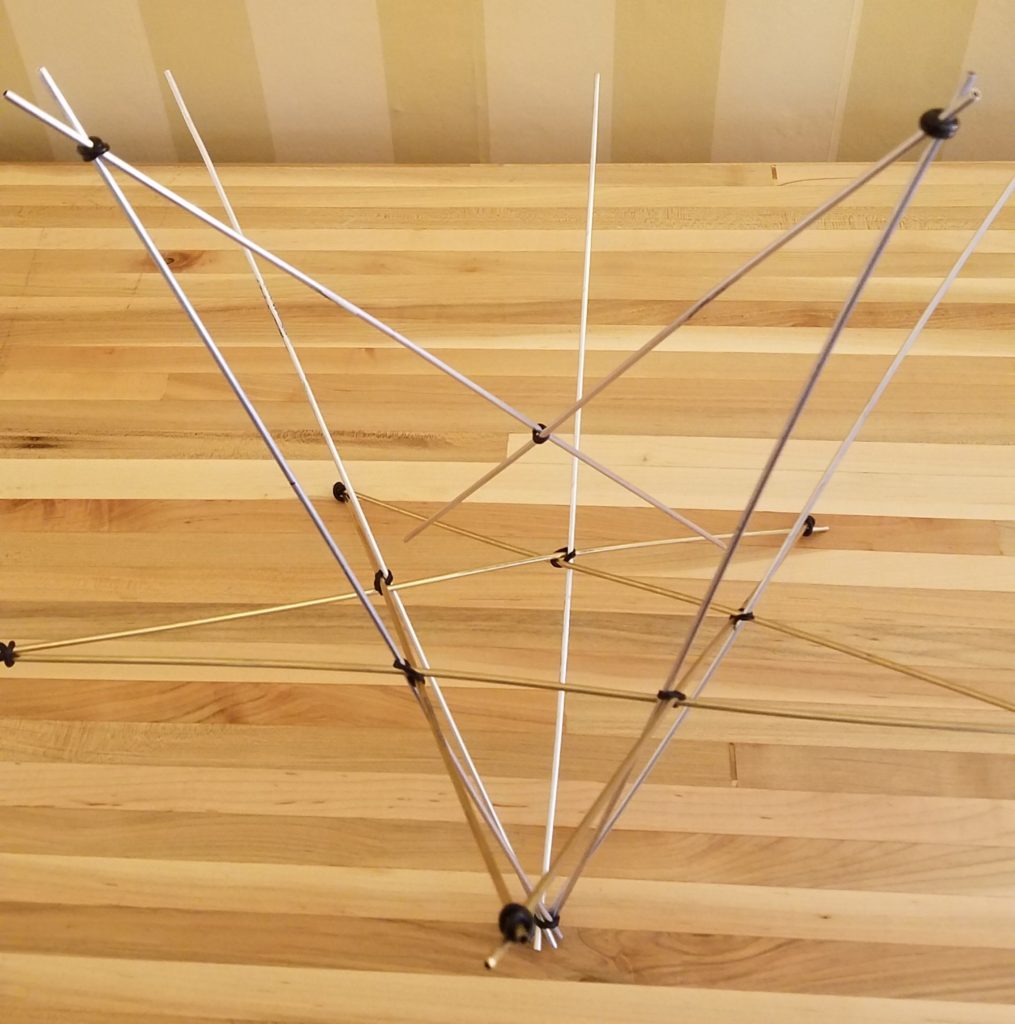
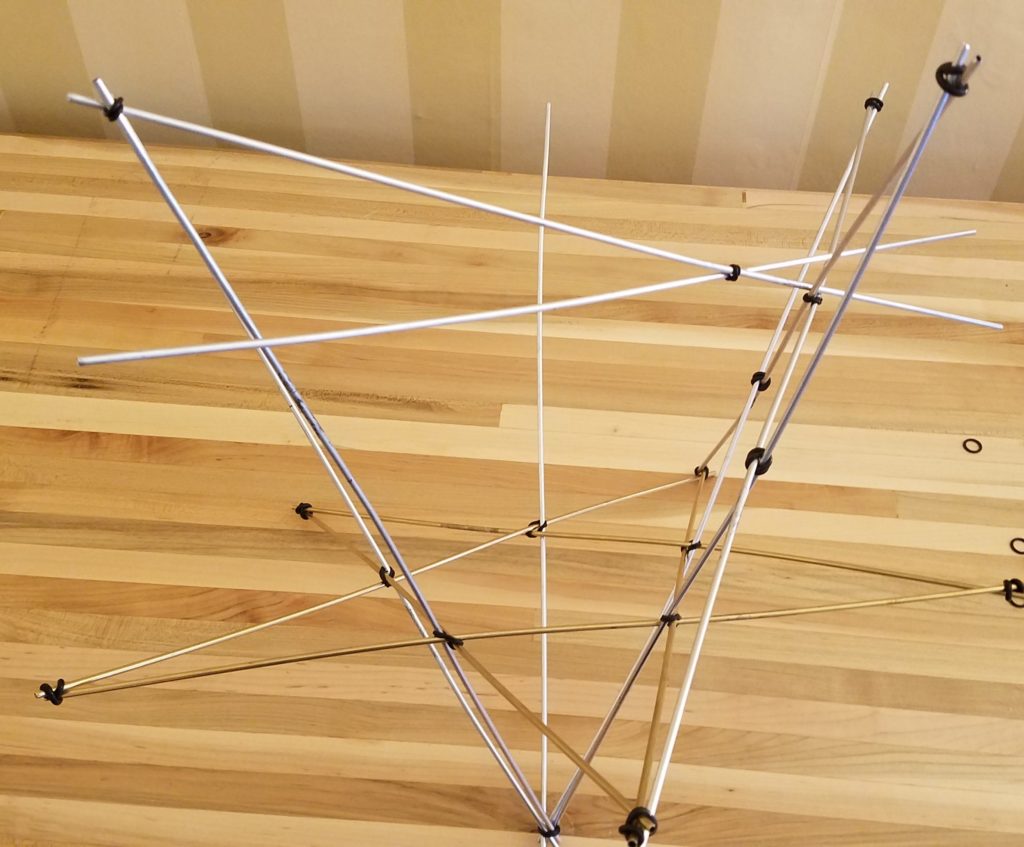
If you look at your structure in progress from the side, you will see three out of five sides of another star. We want to complete that to a full star. So take a linked pair, and link one free end of the pair to each of the two sides of the star sticking out. Push those links in a little way and make sure the junctions all continue the under-over pattern of the first star. If all looks well, you can slide all of the connections until they reach the marks.
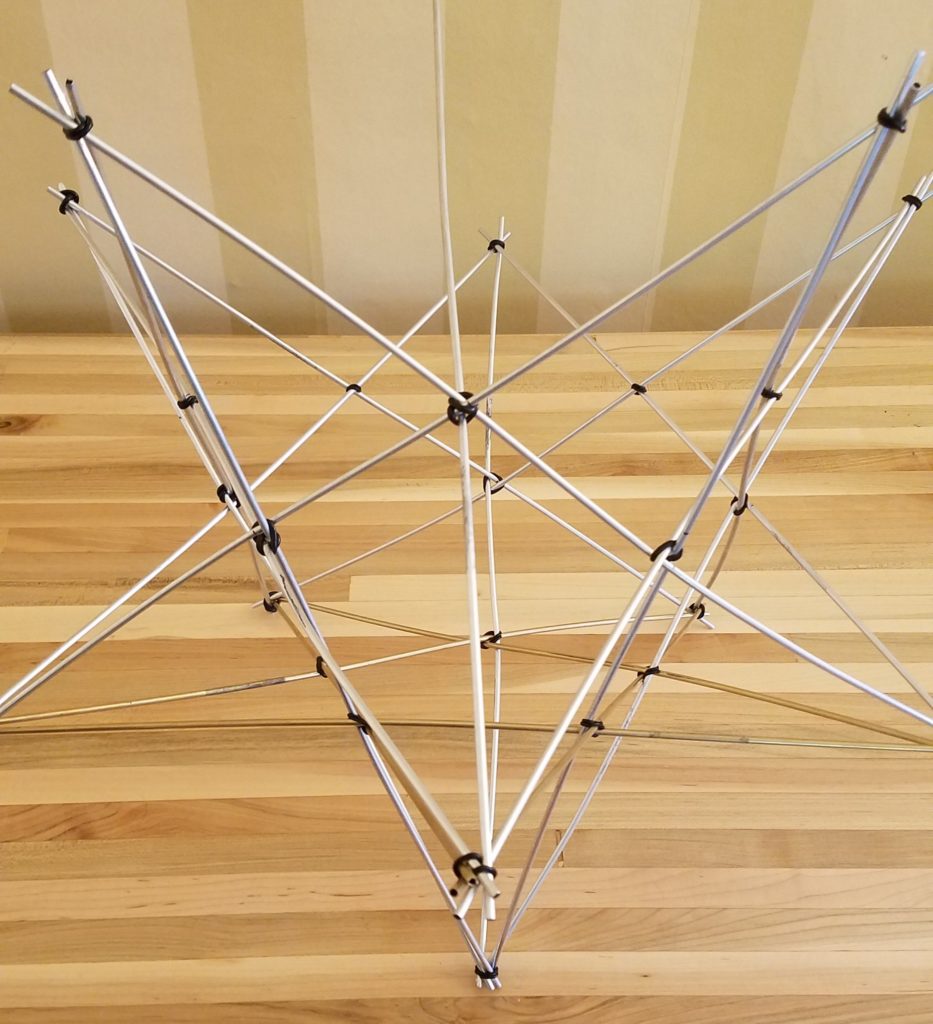
To complete the second star, slip the points of the star past each other as you did with the first star, and secure with rubber bands (there will already be rubber bands for this in place at two of the vertices).
Now rotate the structure 1/5 of a turn around the original star. You’ll see another star with only three sides in place. You want to complete this in a similar fashion. The only difference is that this time, you only make one entirely new link; at the other end of the linked pair you’re adding, you feed the rod through the existing rubber band at an internal junction. Make sure to continue the same under-over pattern throughout. The new rod should pass through a triangle in the second star that does not yet have a rod passing through it (it should not pass outside the second star or through the pentagon of the second star).
When that one’s done, add two more linked pairs to complete two more stars in exactly the same fashion.
The next linked pair is very similar to these; you just have to feed both of its free ends through existing junctions. When that’s done, you’ve finished six of the twelve stars in the SSD.
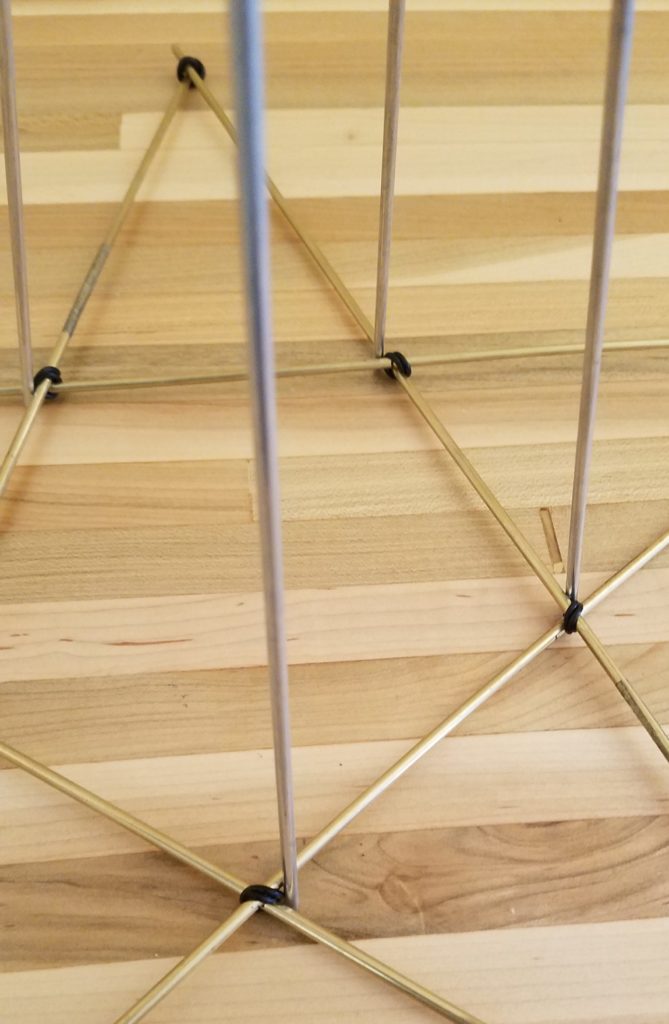
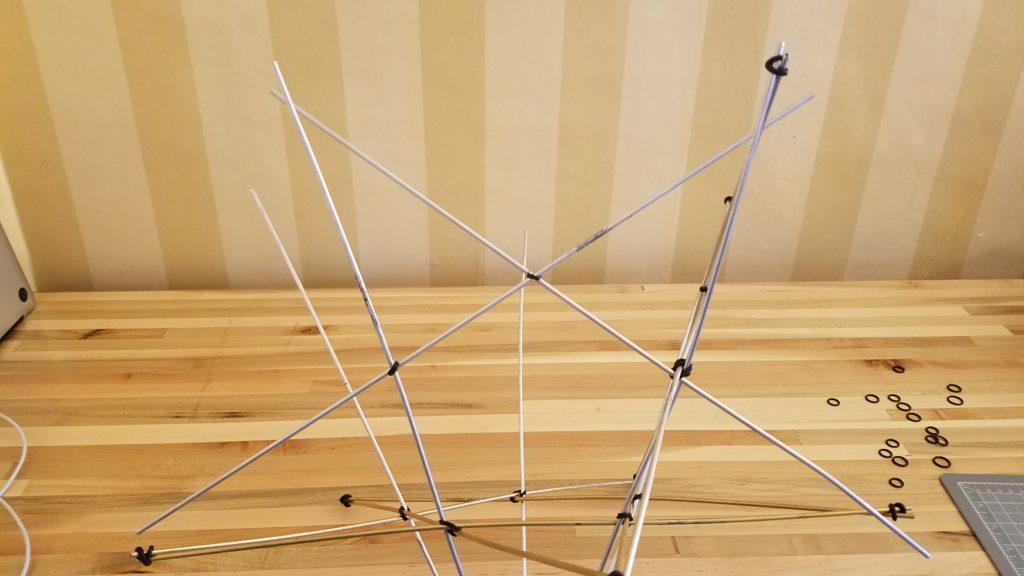
To continue from here, take a single rod (not a linked pair) and feed it through any of the partial vertices and the nearest internal junction that only has two rods at it, as shown.
Adding that rod will create a new partial star with three edges in place. Complete that one just the way you did the third star.
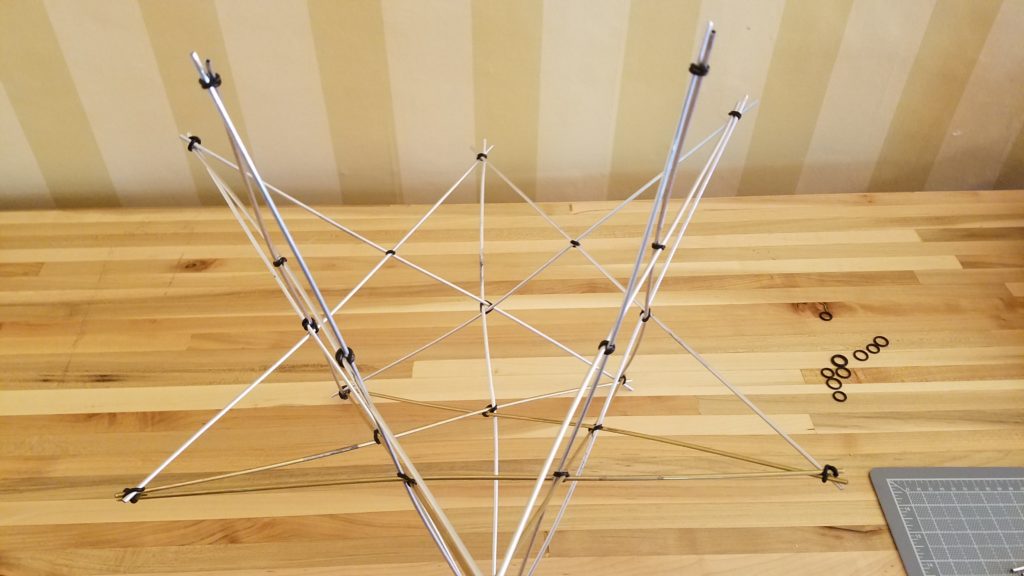
You’re getting close now. Complete two more stars like the third, and then one like the sixth.
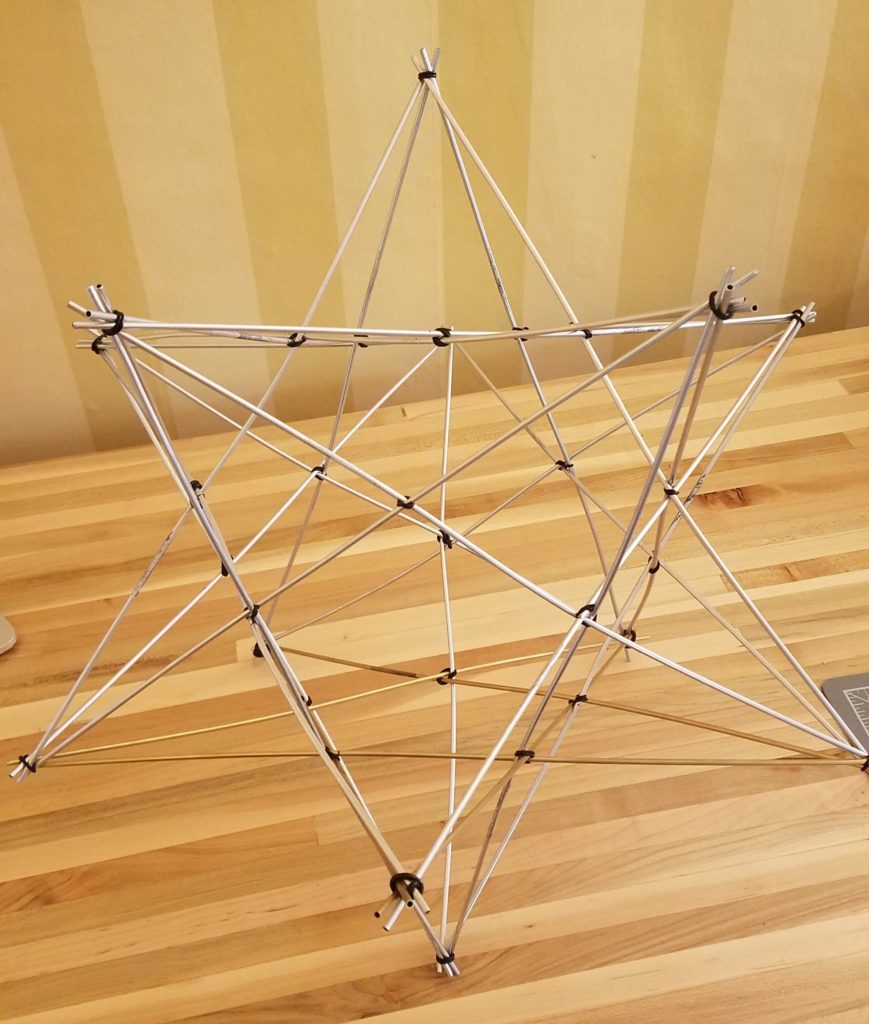
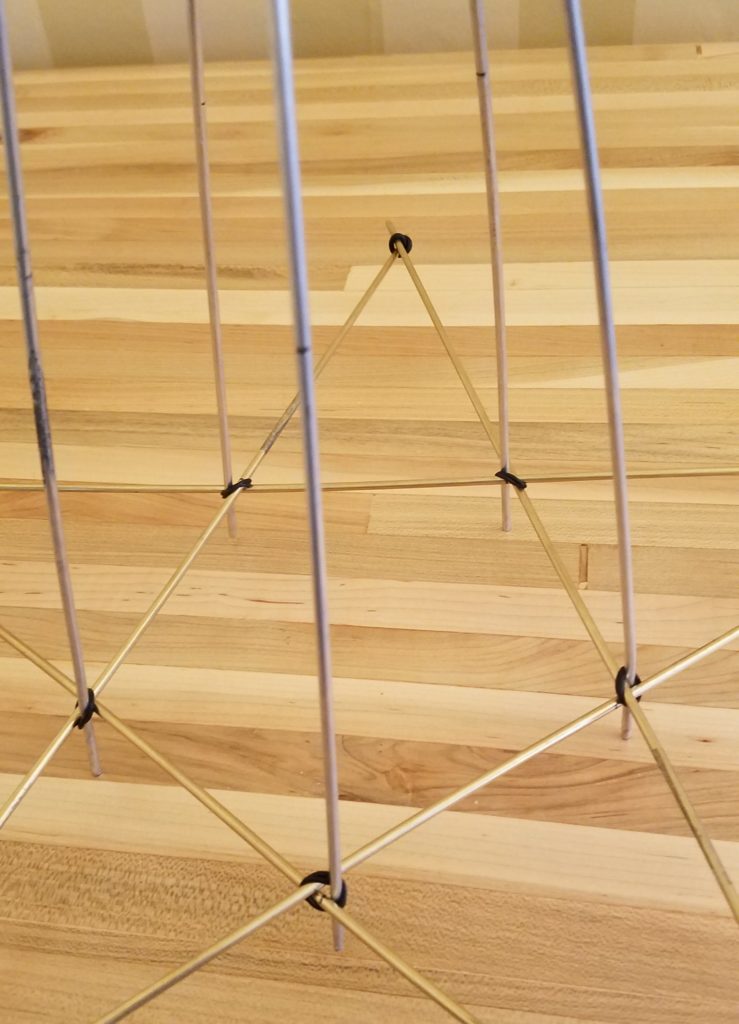
That leaves just a single line of four junctions that does not have a rod going through them (shown down the middle of the image above). Carefully insert the final rod through all four junctions – it’s probably easiest to pass it through the two internal ones first, then tuck the two ends in at the vertices, to produce something like this. (This last edge is again down the middle of the image below.)
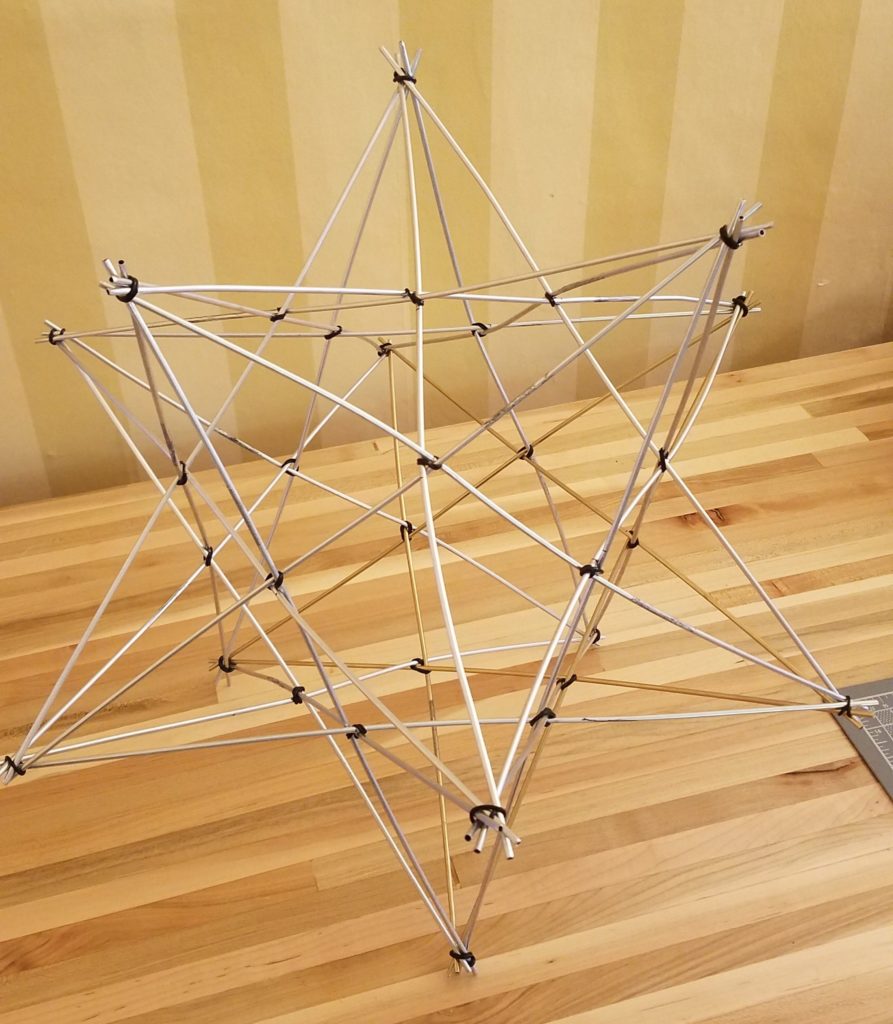
Now comes the exciting final part: cut away all of the rubber bands at the internal junctions. They were just there to stabilize things during construction; they’re not actually needed to hold the SSD together once it’s built, thanks to all of that weaving that we did. And voila!
In fact, if you used a high-friction material like bamboo strips or pipe cleaners, it’s often possible to cut away the rubber bands at the vertices as well. I don’t have a picture of this, as the metal rods are too slippery for the vertices to hold. If you want to try, just proceed carefully, and if any of the vertex junctions “pop,” tie it back up immediately and don’t cut any more (unless you want to quickly revert to a pile of separate rods).
If you like this construction and happen to be in Providence on 2019 Sep 28, come to the ICERM Open House at WaterFire Providence and help build a glowing version with 10-foot pipes for the rods!