Paper TOWARD
If you want to try making TOWARD at home or in your classroom, today we’ll look at a paper option.
There are many ways to go about building truncated octahedron (TO) with paper. A simple tabbed net is given at polyhedra.net. Rona Gurkewitz and Bennett Arnstein give a nice modular origami construction method for building a TO (and much more!) in their book Multimodular Origami Polyhedra: Archimedeans, Buckyballs, and Duality.
I was looking for a simpler construction, since we’re going to need to construct and connect 38 TOs to build the TOWARD model like the one at Harvey Mudd College. A net requires 23 edges to be joined, while the origami model requires 24 modules per TO. Either would be time-consuming and I was looking for something that I could assemble on my own in an afternoon. I’m presenting a couple options, which will require the following materials:
| Materials | Tools |
|---|---|
| tape | scissors |
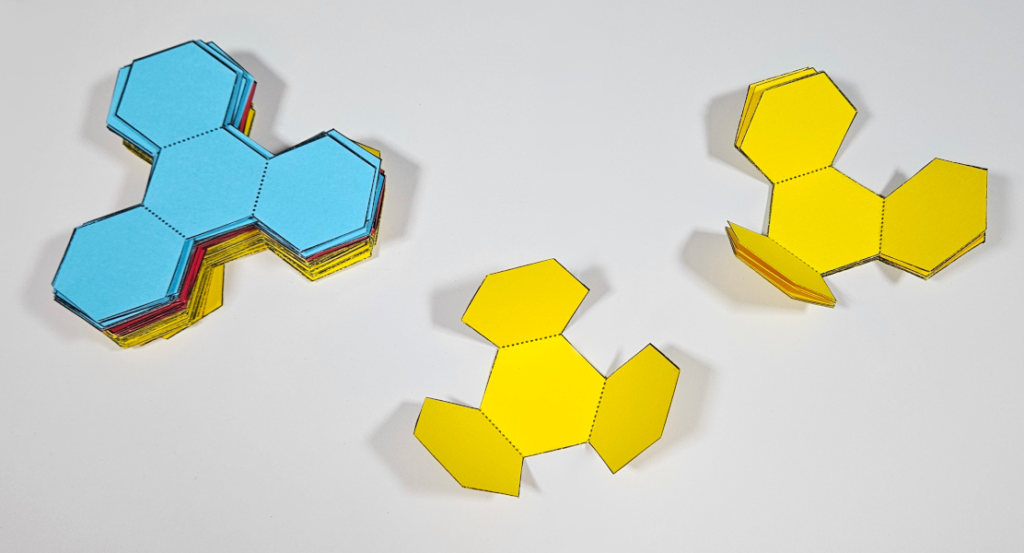
For the small model: (13) copies of page 1 of paper_TOWARD.pdfIf printing in color: (2) in color A, (3) in color B, (8) in color C | colored pens for decorating (optional) |
For the big model: (38) copies of page 2 of paper_TOWARD.pdfIf printing in color: (6) in color A, (8) in color B, (24) in color C | |
| glue (optional) |
As previously noted, the TO is rigid, even if its square faces are omitted.
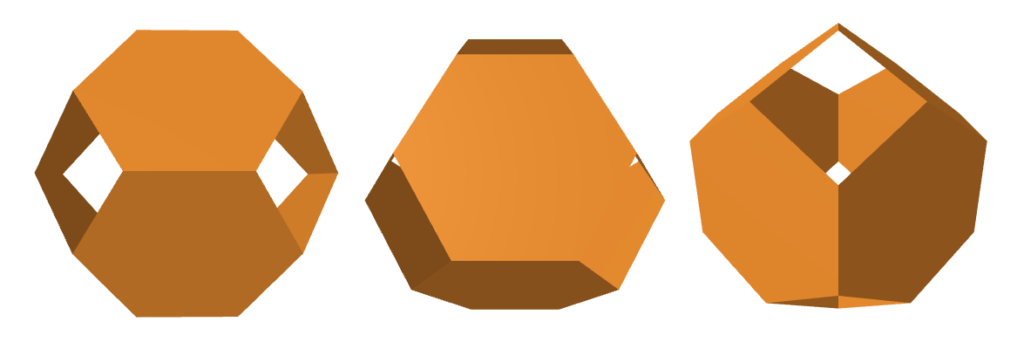
This means we can get away with leaving the square faces as windows, reducing the number of edges you have to join down to just six!
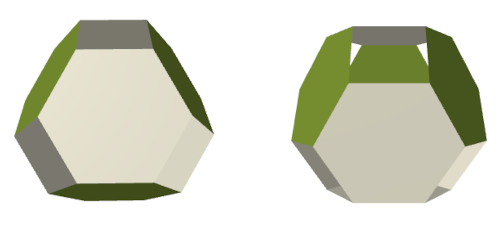
The first page of paper_TOWARD.pdf has six interlocked half-nets that can be combined into three TOs with 0.87 inch edges. The second page has two half-nets that can be combined into a single TO with a 1.4 inch edge length. Look at the diagrams carefully before you start cutting; they can be a little confusing because they just look like honeycombs. But once you realize that you are not going to cut any of the dotted lines, they’re not too difficult to use.
To make your half-units, cut along all bold edges. (The dotted edges are for folding.) If you construct a TOWARD as we did at HMC using 38 TOs, the small model will be about nine and a half inches tall and the big model will be over one foot, three inches.
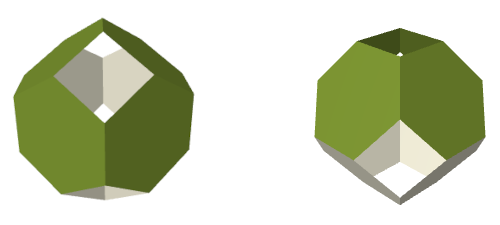
The big ones might make for a nice activity where students decorate their half-nets, fold and tape them, and then assemble them as a class into a TOWARD. Below are some images of a big decorated TO:
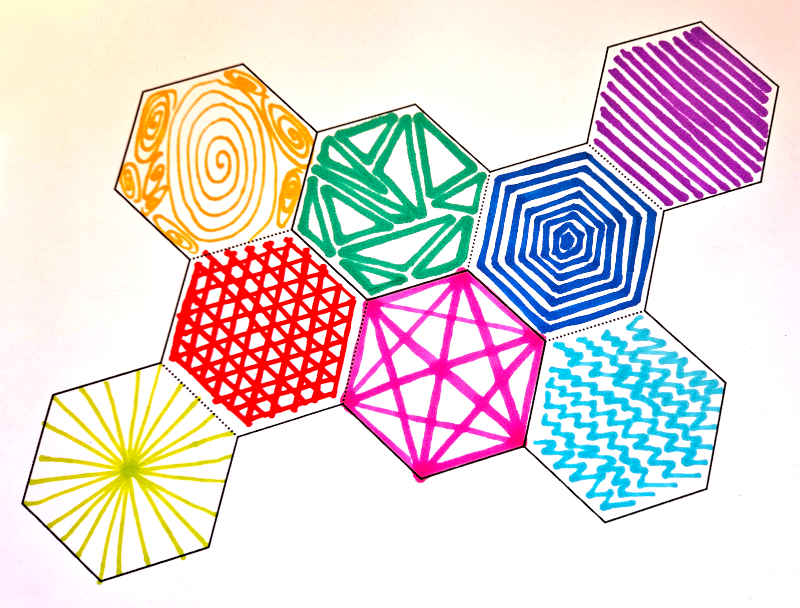
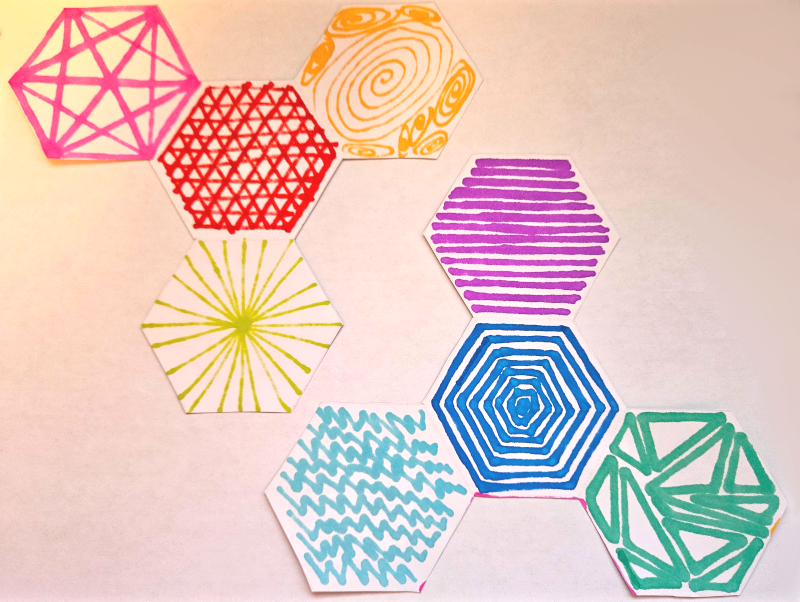

When assembling them into a TOWARD, certain faces of each TO will not be visible based on where it ends up in the structure, so students may want to plan their designs around that.
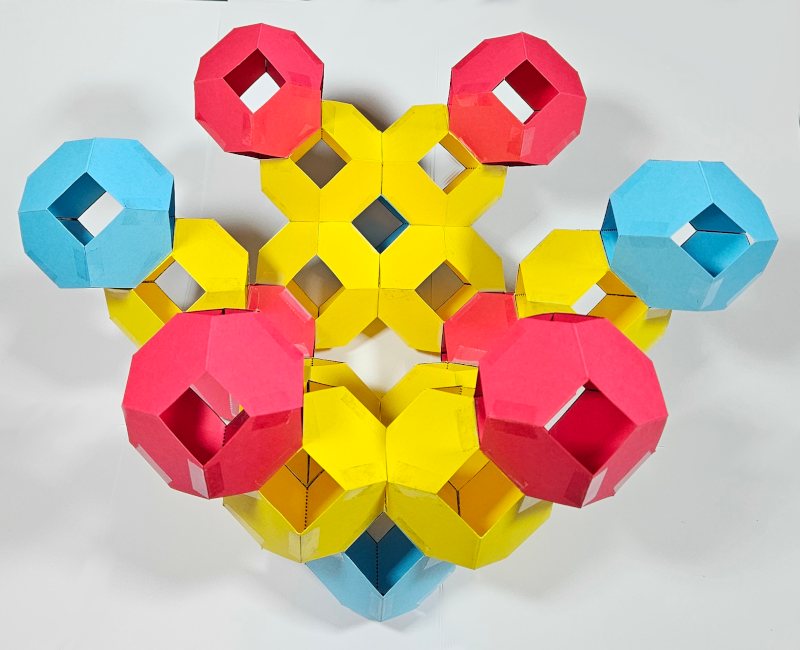
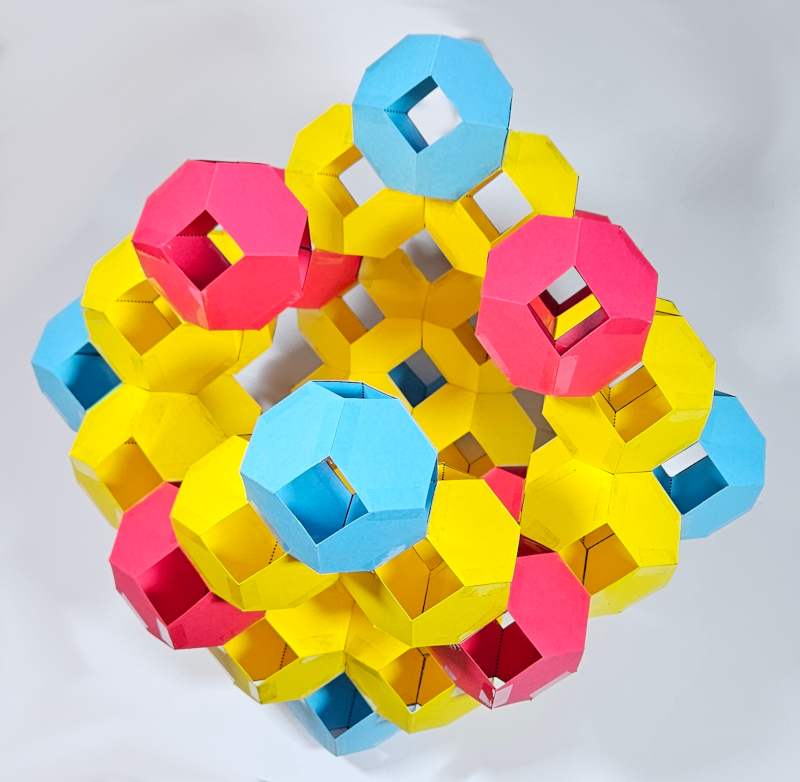
Let’s walk through the assembly steps for the smaller model. I made mine out of three colors of cardstock to highlight the different TO roles.
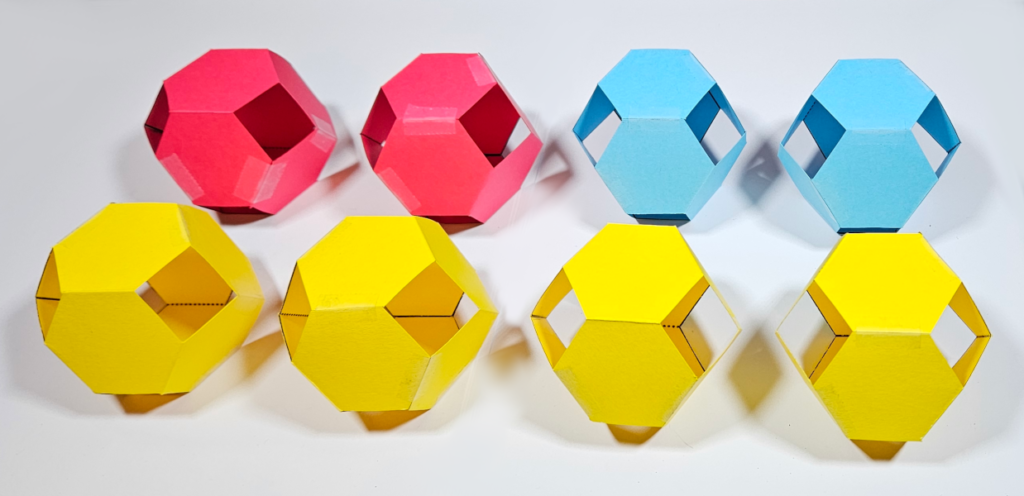
1. Print out the half-nets. You’ll need 13 sheets total. I printed 2 blue, 3 red, and 8 yellow, which will make almost exactly what we need, with one extra red net.
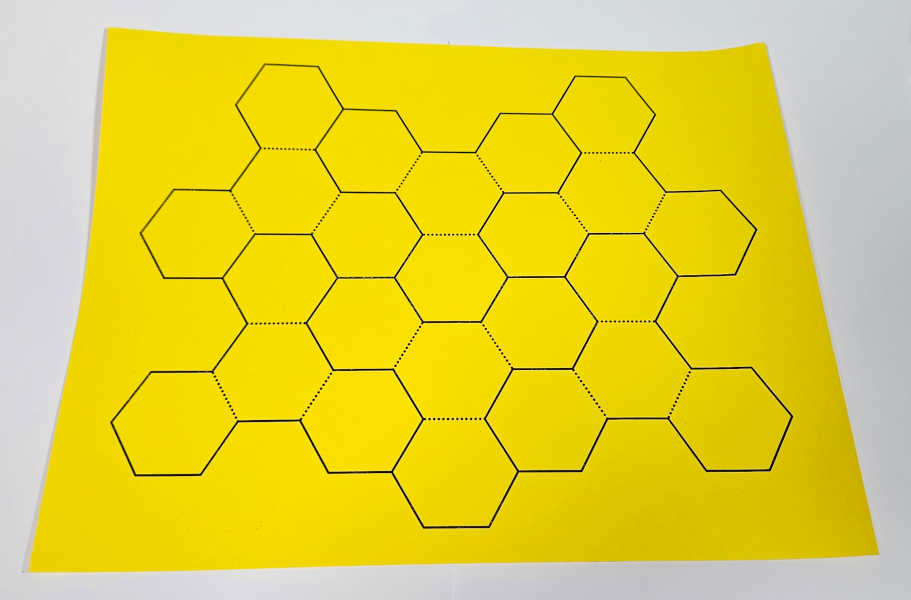
(2) Cut six half-nets from each page. Don’t cut along dotted lines — those are for folding!
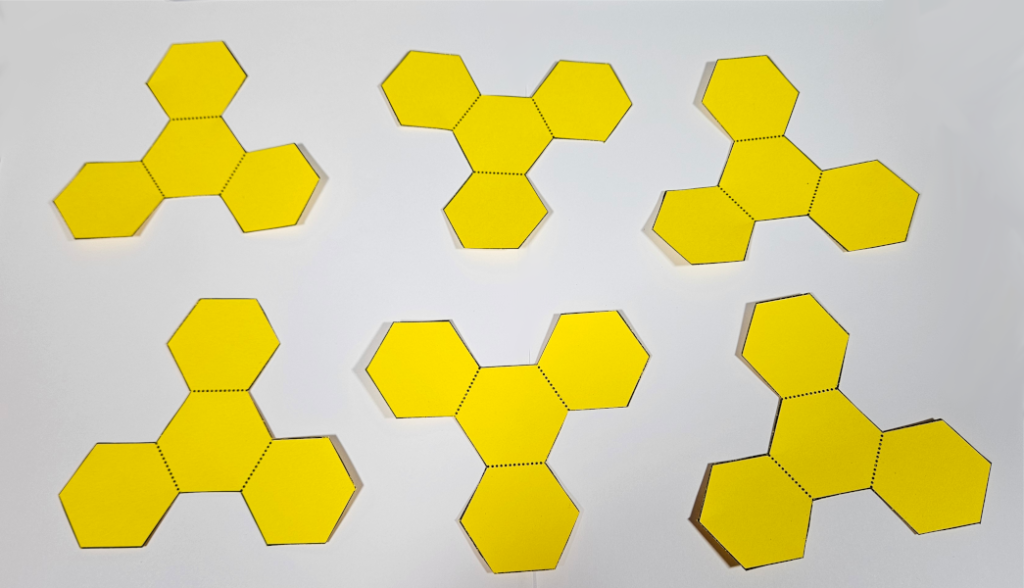
(3) Fold each half-net into a hemisphere. I folded mine so the ink is on the inside, but either way works.
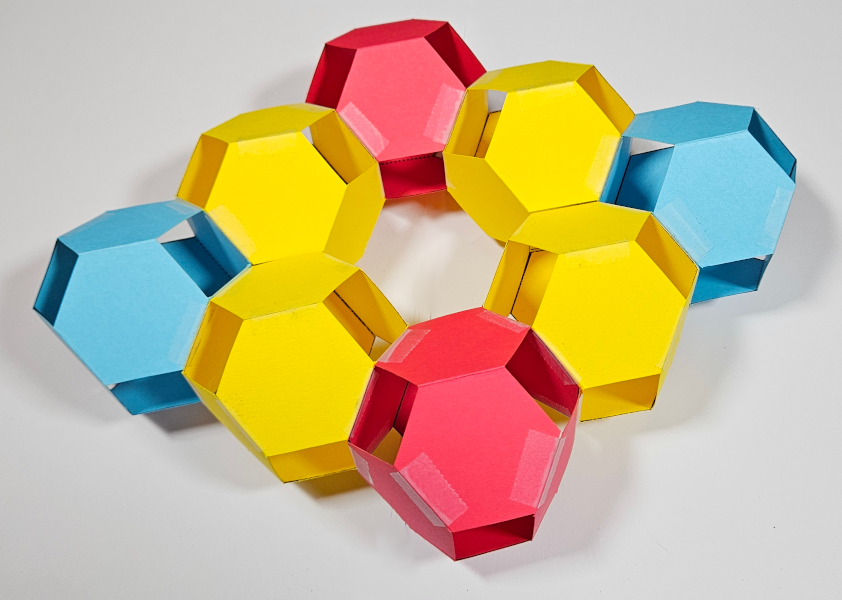
(4) Take two hemispheres and tape them together. Each outer hexagon of one hemisphere will border two outer hexagons on the other, leaving square windows.
(5) Once you have eight TOs, you can make the bottom rhombus of your TOWARD. You can tape window-to-face as I did or use glue or double-sided tape between abutting faces for a cleaner look. When attaching two TOs, make sure that windows don’t share edges with windows of adjacent TOs. (There will be two square windows that abut, as on the paired yellow units, which is fine.)
(6) Attach six more TOs in the next layer up. The faces to link to on each piece vary by the piece type, and are highlighted in green below:
(i) Edge TOs (mine are yellow) connect to other TOs via a pair of opposite hexagons.
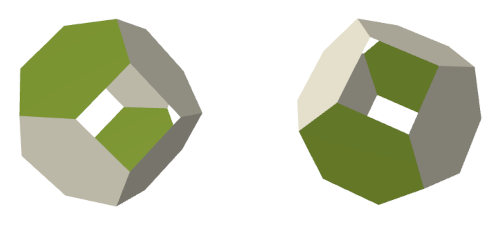
(ii) Degree-3 vertex TOs (mine are red) connect to others via the three hexagons bordering some common hexagon.
(iii) Degree-4 vertex TOs (mine are blue) connect to others via the four hexagons bordering some common square window.
Each edge TO will be between one degree-3 vertex TO and one degree-4 vertex TO. Vertex TOs will only connect to edge TOs, Keep in mind that we are building a ball-like structure. Here is how to attach the six new edge TOs in the layer above the rhombus and obey the rules:

Two have been attached to each degree-4 vertex TO and one to each degree-3 vertex TO.
(7) Attach four degree-3 vertex TOs and two degree-4 vertex TOs in the next layer up. Here is how it should look:
(8) Each degree-4 vertex TO in this last layer is spaced one TO away from two different degree-3 vertex TOs. Connect an edge TO in each of these four gaps.

(9) Add six edge TOs in the next layer up.
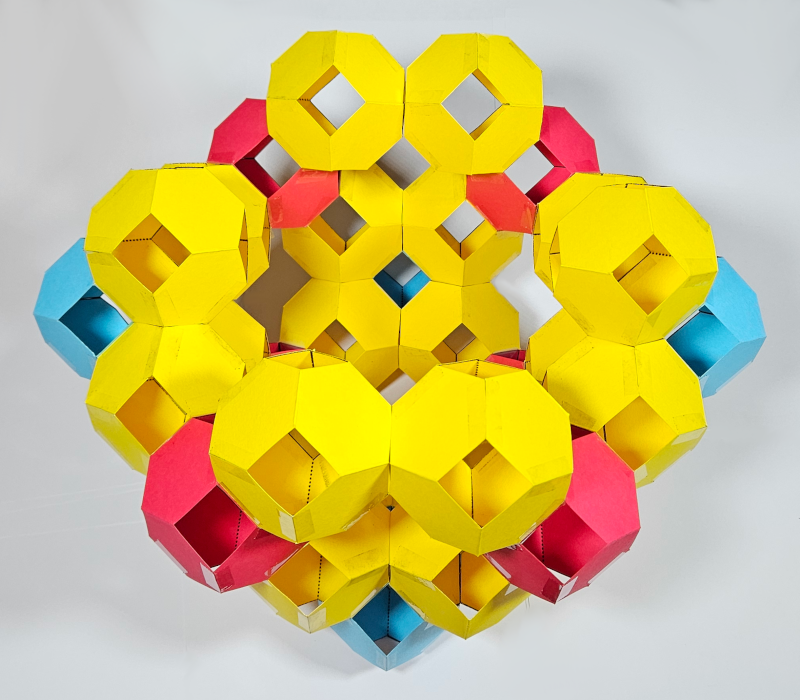
(10) Add two degree-3 vertex TOs and two degree-4 vertex TOs in the next layer up.
(11) There are four TO-sized gaps between these new vertex TOs. Connect an edge TO in each gap.
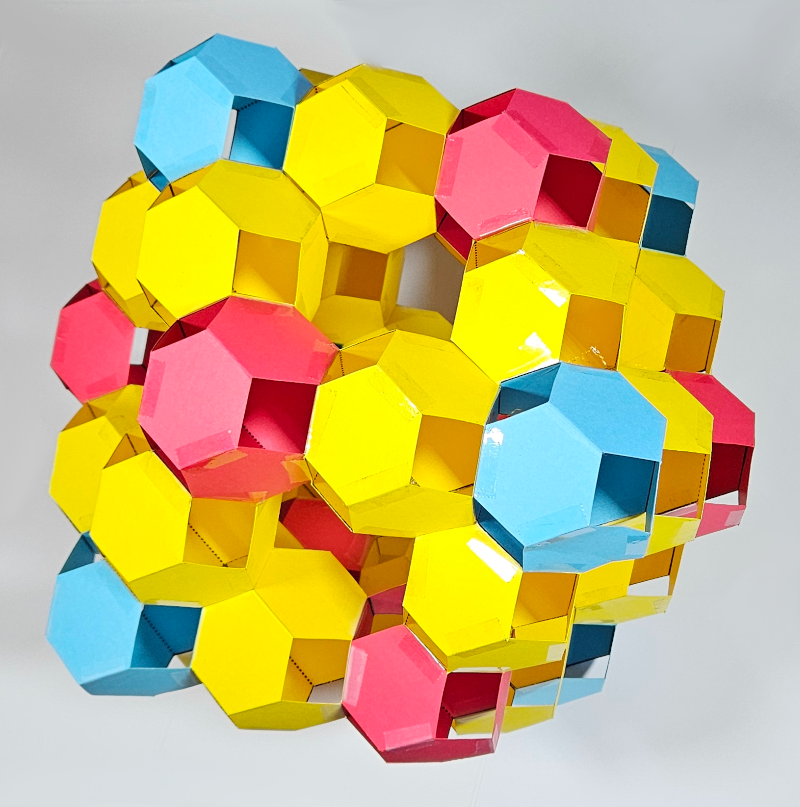
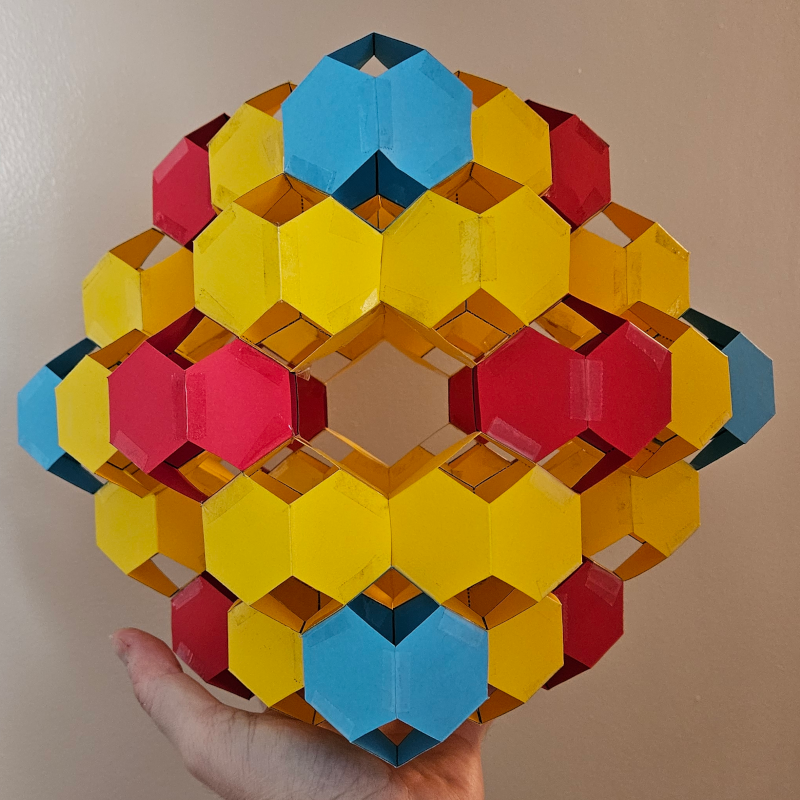
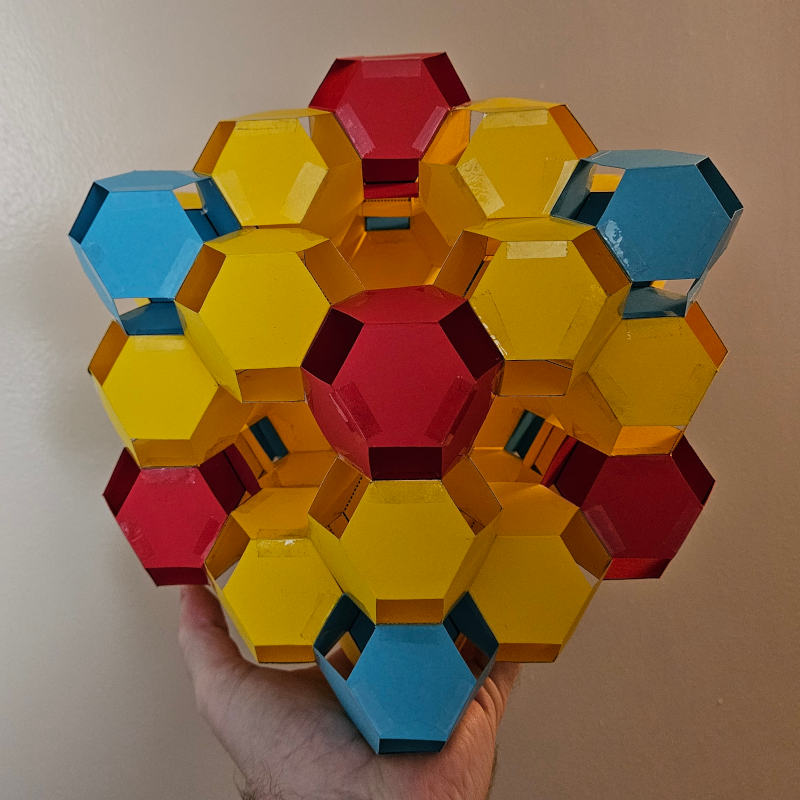
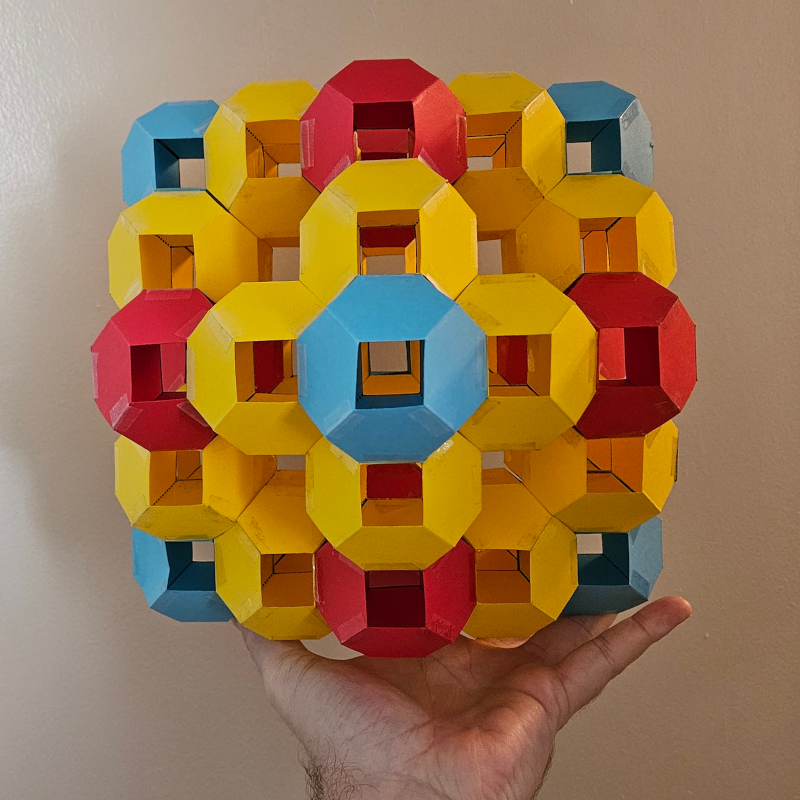
The construction is finished! Here it is from a few different angles: