

Good In Tensions
So why the interest in tensegrity here at Studio Infinity? It begins with Kenneth Snelson, the inventor of tensegrity (although perhaps not of the term) as a student of Buckminster Fuller. Ken went on to become a noted sculptor, using tensegrity in many of his works. One of those sculptures, Free Ride Home, resides at Storm King Art Center. And recently, the education department at Storm King Art Center invited me to give a workshop there about tensegrity, how to make simple models of tensegrity, and how to share ideas about tensegrity with the public visiting the Center.
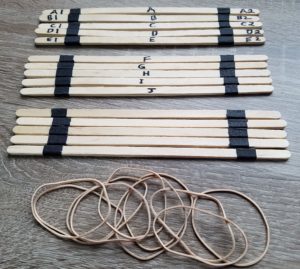
| Materials |
|---|
| 15 struts; recommend labeling 10 of them A through J |
| 10 rubber bands |
 |
Thus, much of what you see here at S∞ reflects the thinking that went into that workshop. In particular for the occasion, I wanted to demonstrate a new tensegrity structure, and talk about its design process, as a means of strengthening the connections between math and art. This article will take you through building a model of that new structure.
Once you have your materials collected, you’re going to start by constructing a pentagon from five of the struts equipped with rubber bands. This pentagon will end up forming the bottom of the finished structure.
To build the pentagon, start by connecting one end of strut B to the rubber band strut A, one third of the way from one end of A to the other. Lie the two struts down so that B connects under the right side of A and extends off to the right, as shown.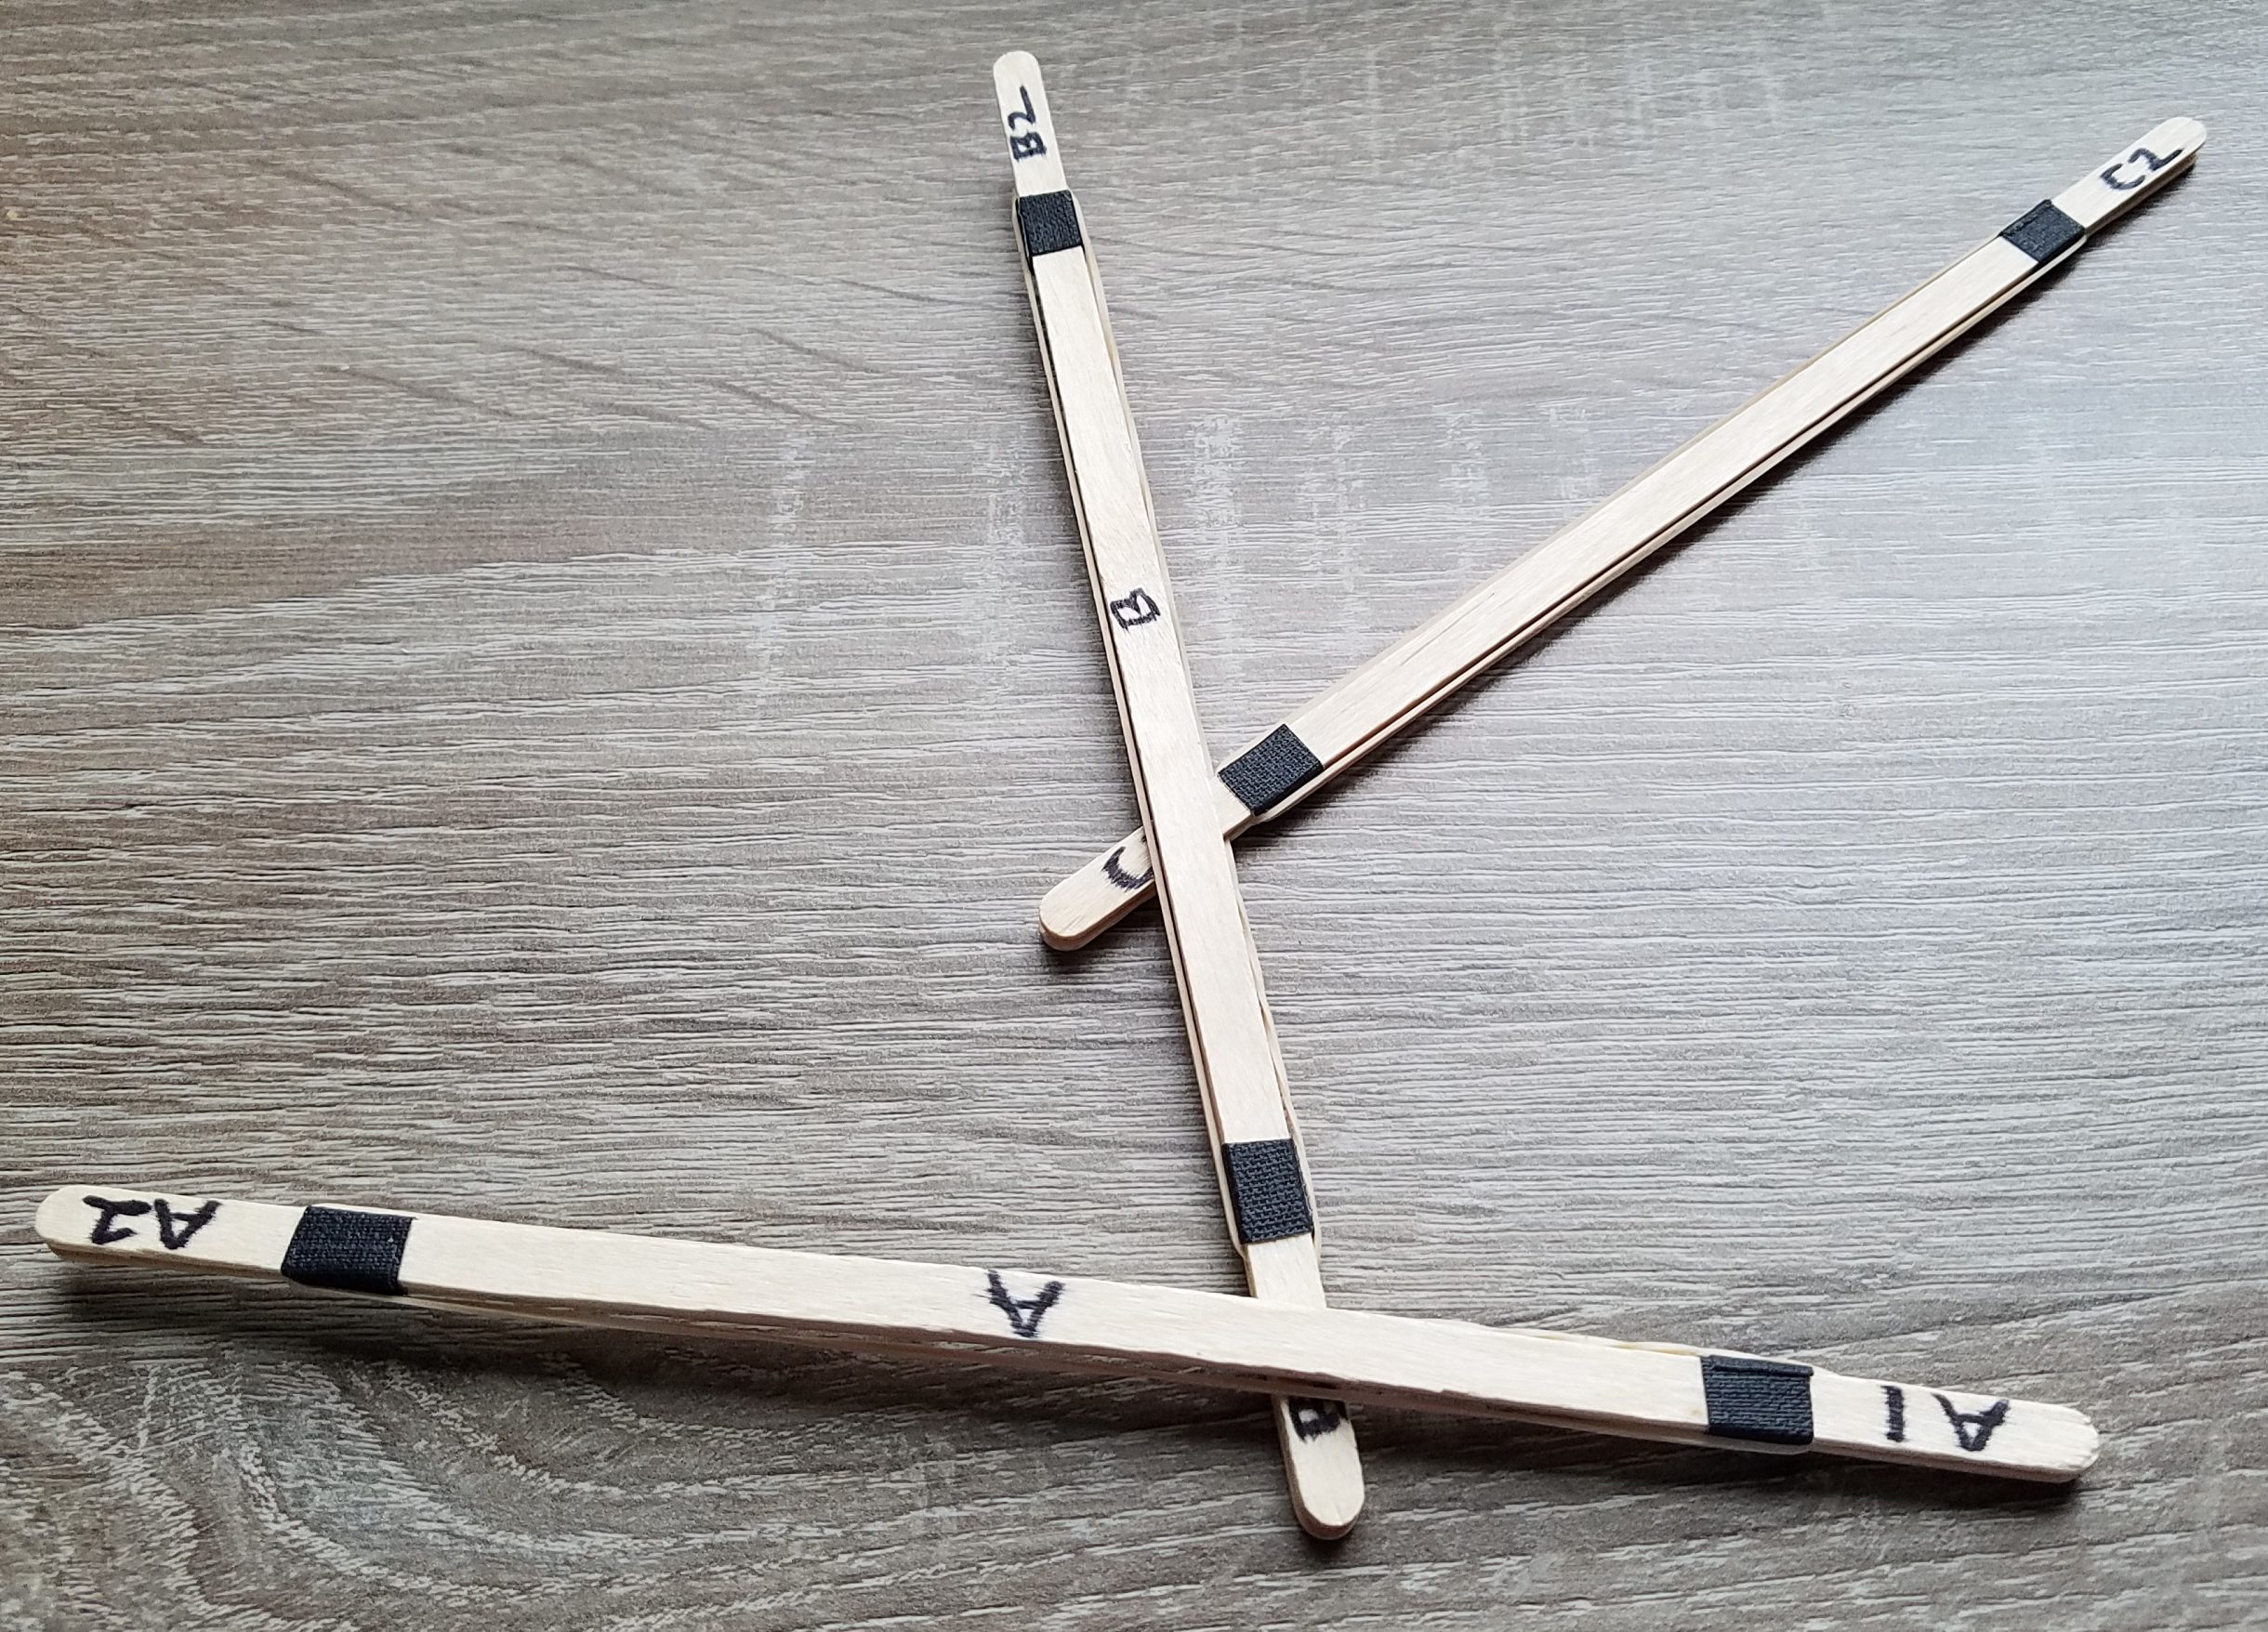 Then take another strut C and connect it to the right-side band of B, one third of the way along B from where B connects to A. Continue in this same fashion, connecting a fourth strut D to C in a similar spot, and a fifth strut E to D. At this point, what you have should look like this.
Now you can see that one free end of A is just in position to connect to E in the same way as all the others. So make that connection, and your pentagon is complete: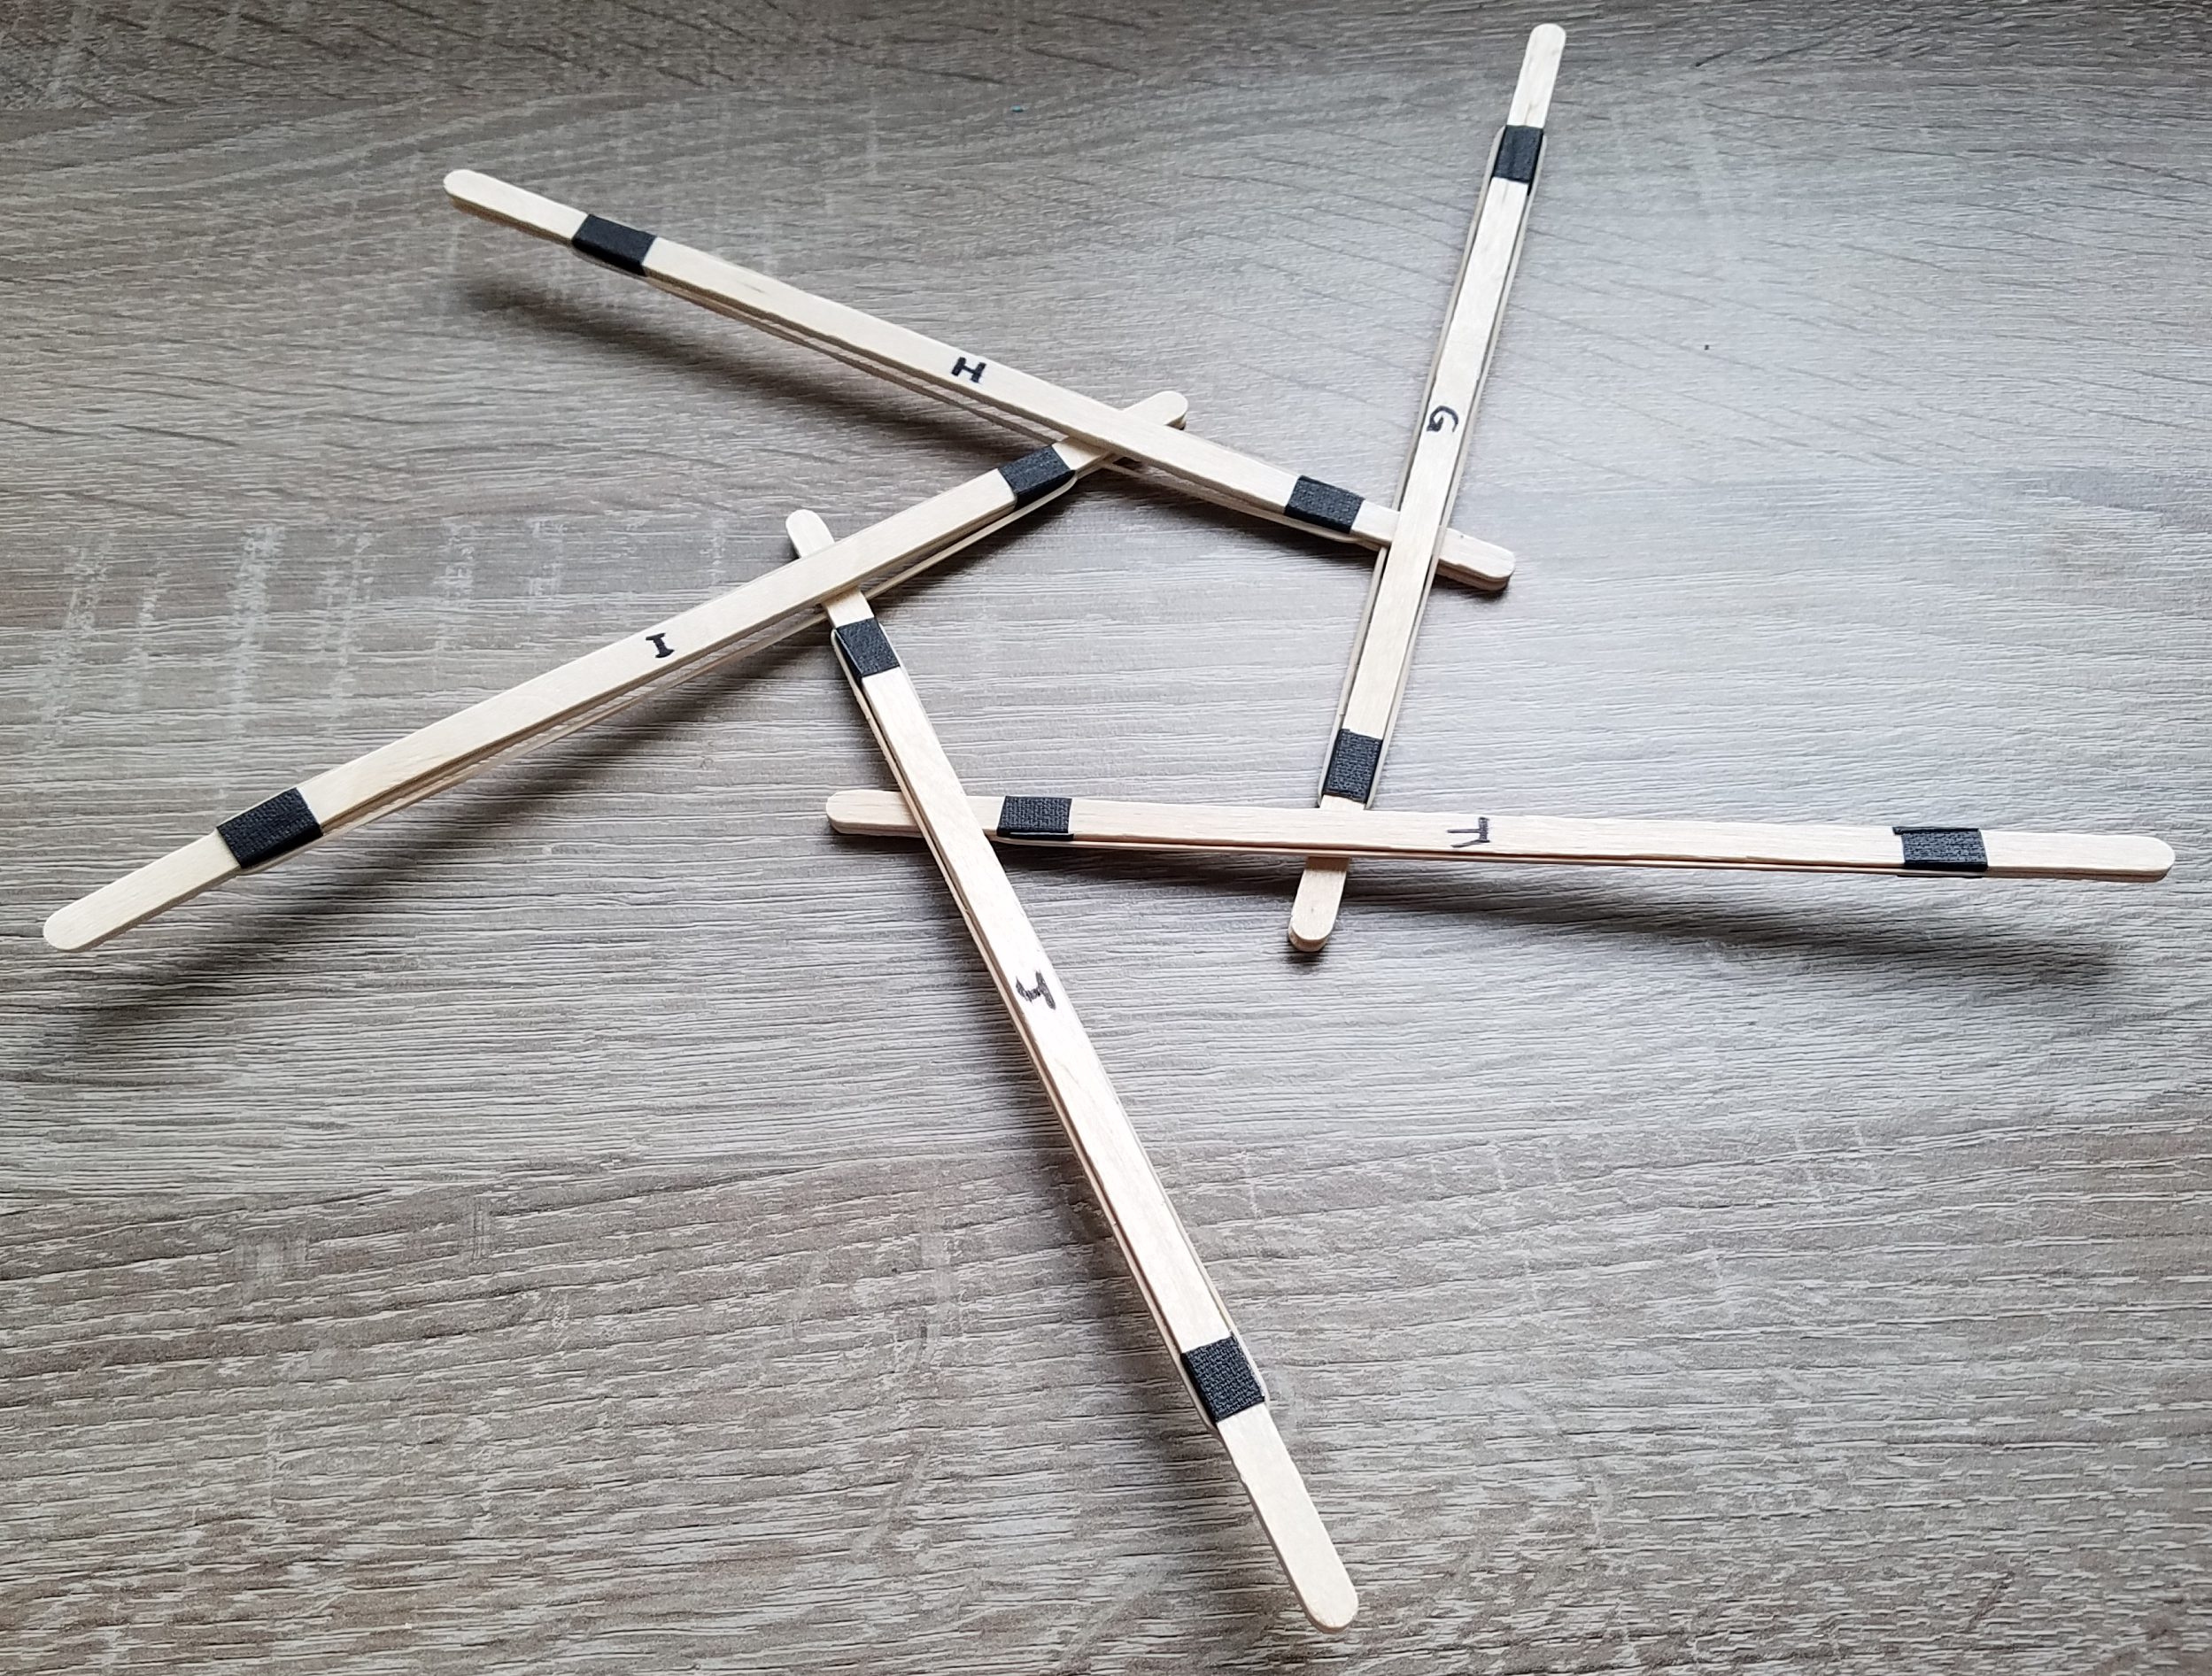
Now it’s time to make the top of the tensegrity structure, which is also a pentagon. This step gave me a great deal of trouble; I could make the pentagon just fine, but then the two pieces wouldn’t connect properly together. I struggled until the realization finally came that the top pentagon needs to be the mirror image of the bottom pentagon. So you need to reverse the earlier instructions.
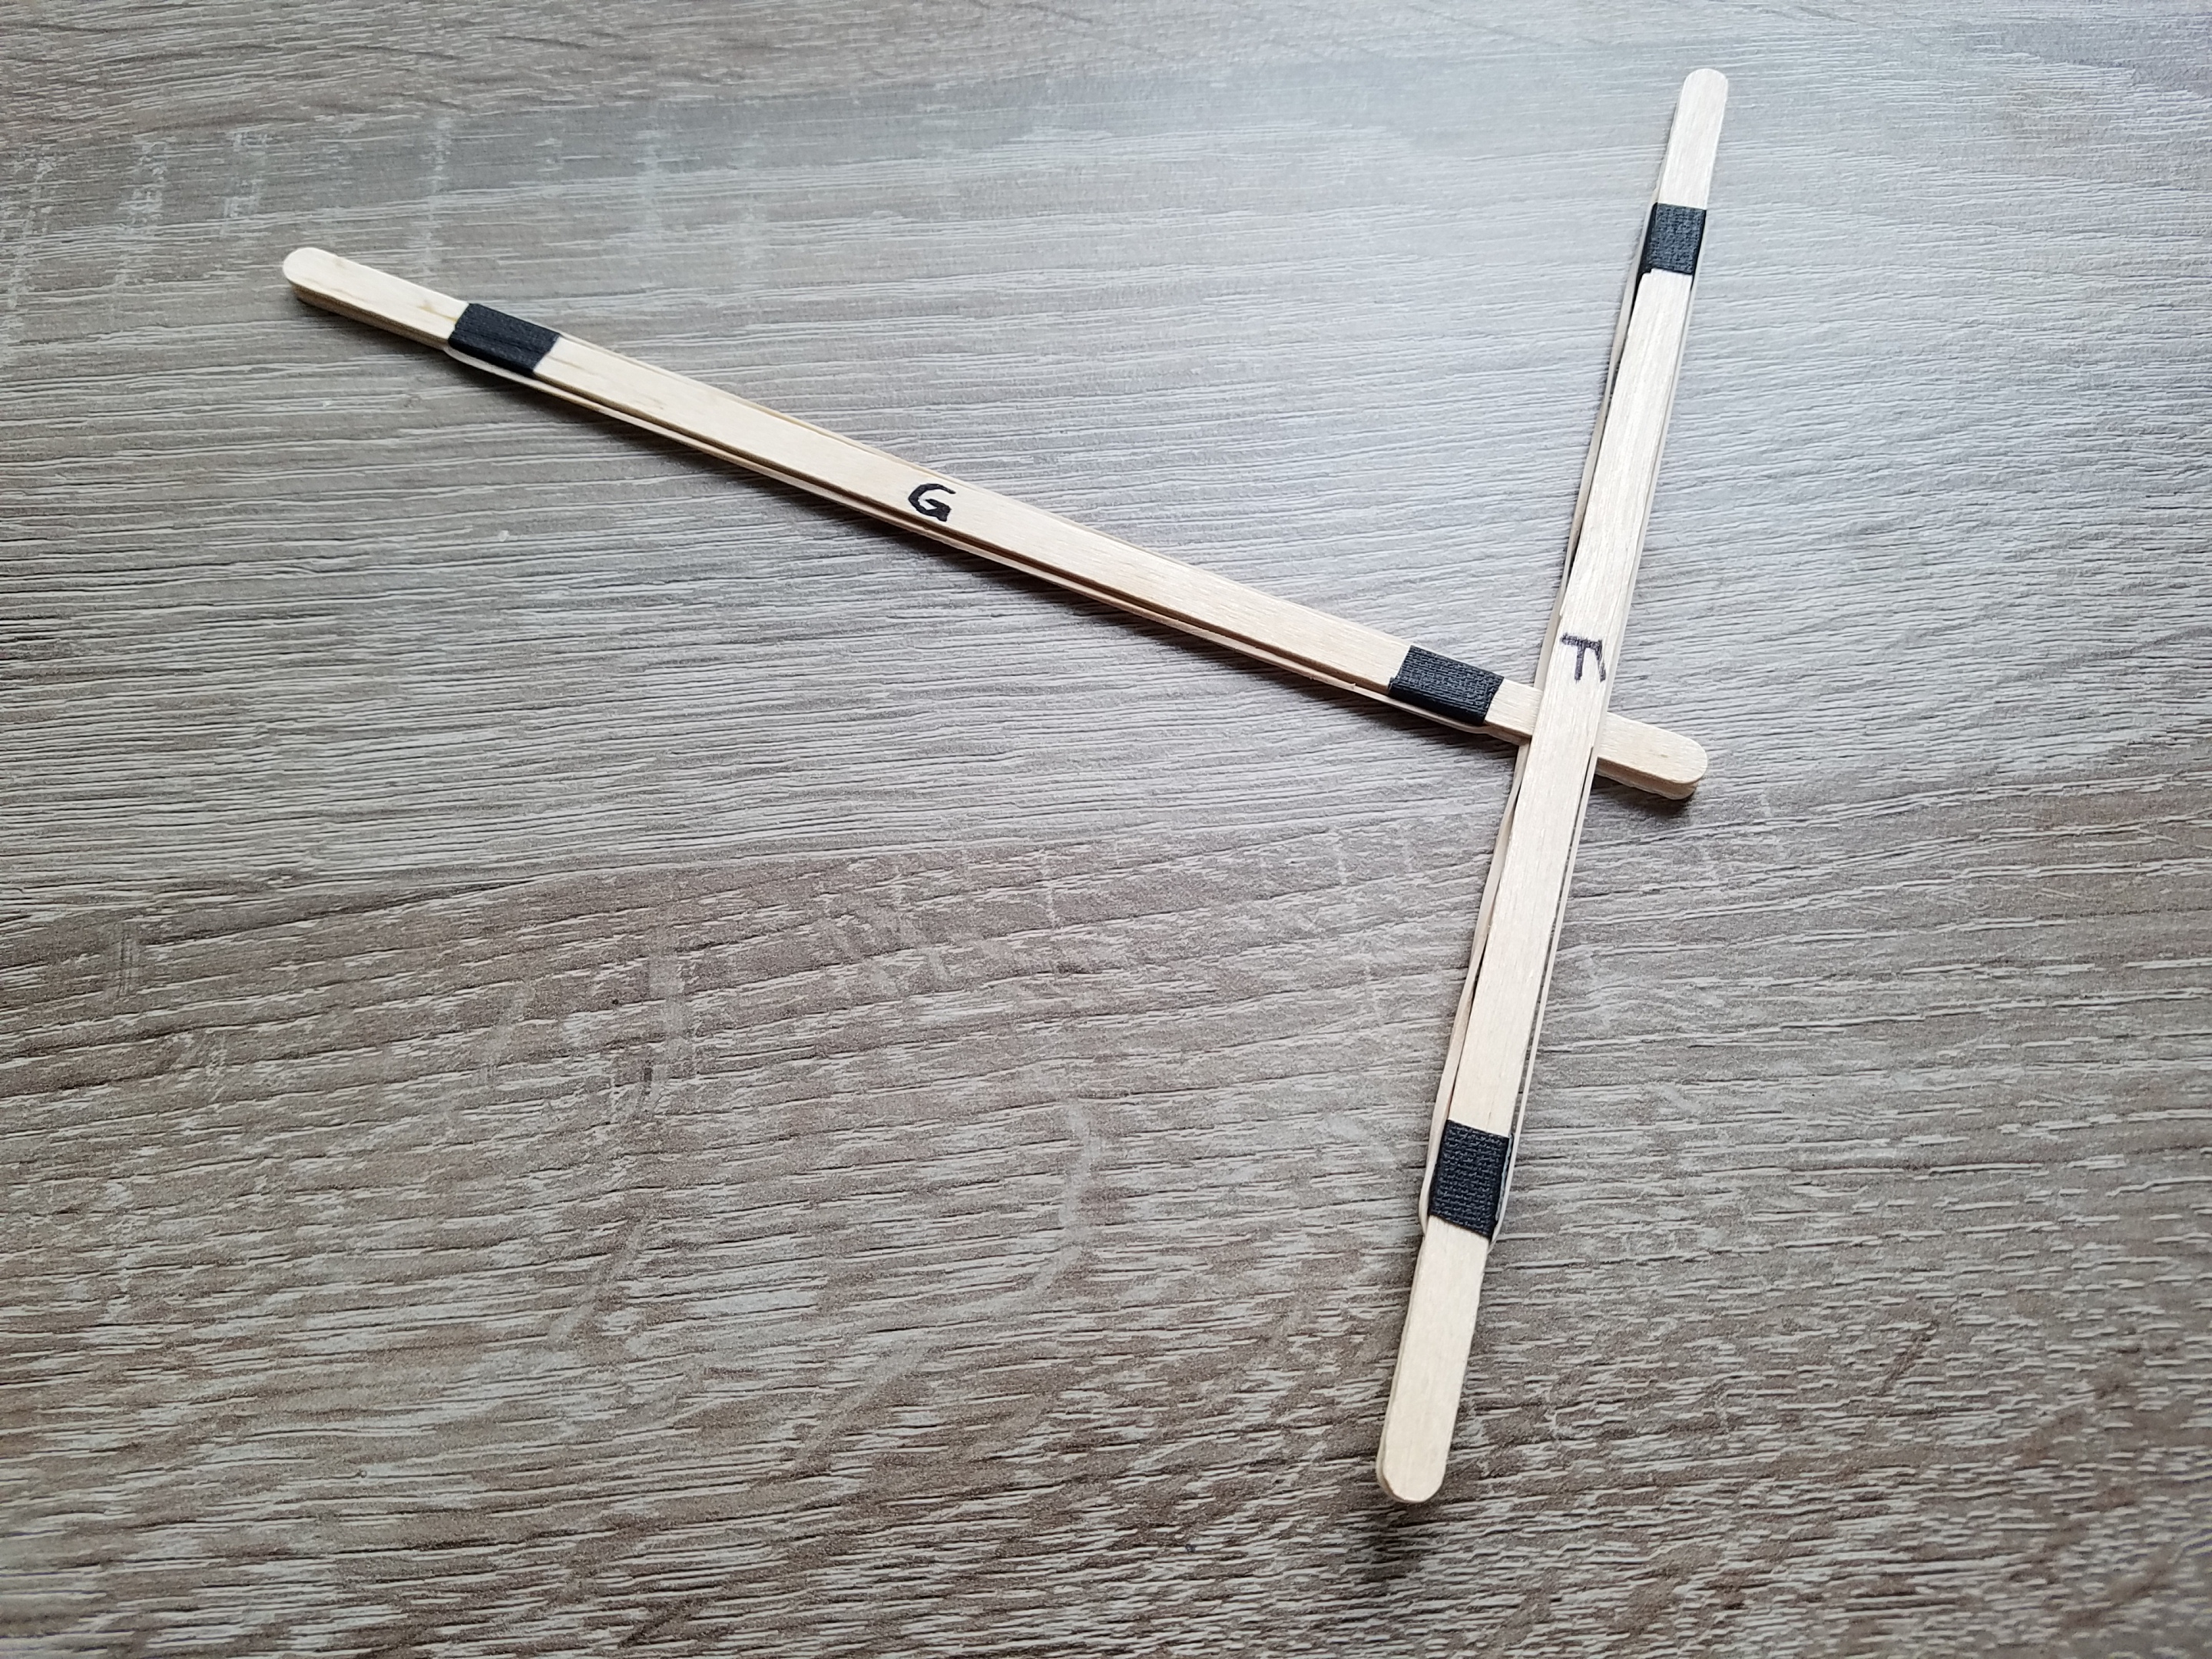


Start by connecting one end of a strut G to the band of F one-third of the way from the end. Lay it down so that I connects to the left-hand side of F and extends off to the left. Now proceed to the left, connecting strut H to G, I to H, and J to I. Finally, strut J will connect back to F, producing the top pentagon which will look like this:
To continue the assembly, flip the top pentagon over and lay it on top of the first pentagon with the long ends of its struts lying between adjacent pairs of struts from the bottom. Now you’re going to “sew up” the two halves by connecting the ten free ends of the struts around in a circle. I will assume you’ve laid the top one down so that the strut labeled F lies between A and E on the bottom. Supposing so,
 you can start by connecting the free end of F to the rubber band of A. Connect it to the opposite side of A as the existing connection to A, and one-third of the way from the opposite end of A, as shown on the left.
Now just proceed around the circle, making connections in exactly the same way: the free end of G into B, the free end of H into C, I into D, and J into E.
Now you have to go back and connect the free ends of the other set of five struts. The free end of A is supposed to connect to G in exactly the same way as the previous five connections connections: on the opposite side and opposite end as the connection of H into G. It may seem ridiculous at first glance that the free end of A can get all the way over to where G now is, but just wrangle things around until it does. Then you “just” need to continue in the same fashion, connecting B into H, C into I, D into J, and finally E into F.
Unfortunately, the construction can get a bit tangled up as you go, as shown in the picture on the right, and you may find that some of the original connections are popping out. If you do, don’t despair; go back to the original pentagons and seal in the connections with additional pieces of tape on the other side of the rubber bands, as shown on the left. Then re-start the sewing process. In fact, the only reason not to simply take the precaution and secure the original connections as shown is if you think you may want to take your tensegrity structure apart again (and perhaps build something else).
 In any case, if you persevere, you will eventually get to the last connection, of E back into F. To the right is a picture of what the structure should look like just before that last connection. Once the two halves are all sewn up, your structure should look like the following.
Now in theory, theory and practice are the same; but in practice, they differ, and here’s the point of divergence in this project. The theoretical plans for this construction called for a strut to extend between pairs of points as marked in red in the picture below (two of five such pairs are marked).
However, at this point I could see that the assembly already had most of the structure that I intended it to have; it was just taller and narrower than the intended icosidodecahedron. So most of what I wanted to accomplish was to spread out the middle of the nascent sculpture, so it would take on more of the desired ball-like form. And I wanted to do this in a way that would preserve the five-fold rotational symmetry that the structure so far possessed. So I shifted the new struts more toward the equator so that they would spread the structure more effectively, and planned them out so they would form roughly a pentagon.
So, to finish off the piece, take  a new strut with no rubber band of its own, and connect it between the points marked in blue above. (You’ll notice the middle of the structure start to widen out a bit.) Note that there is a zig-zag band of ten short rubber segments (see the image to the right) around the “equator” of the structure, and you just have to connect the midpoints of two of those that are separated by two intermediate segments. The image at the left
 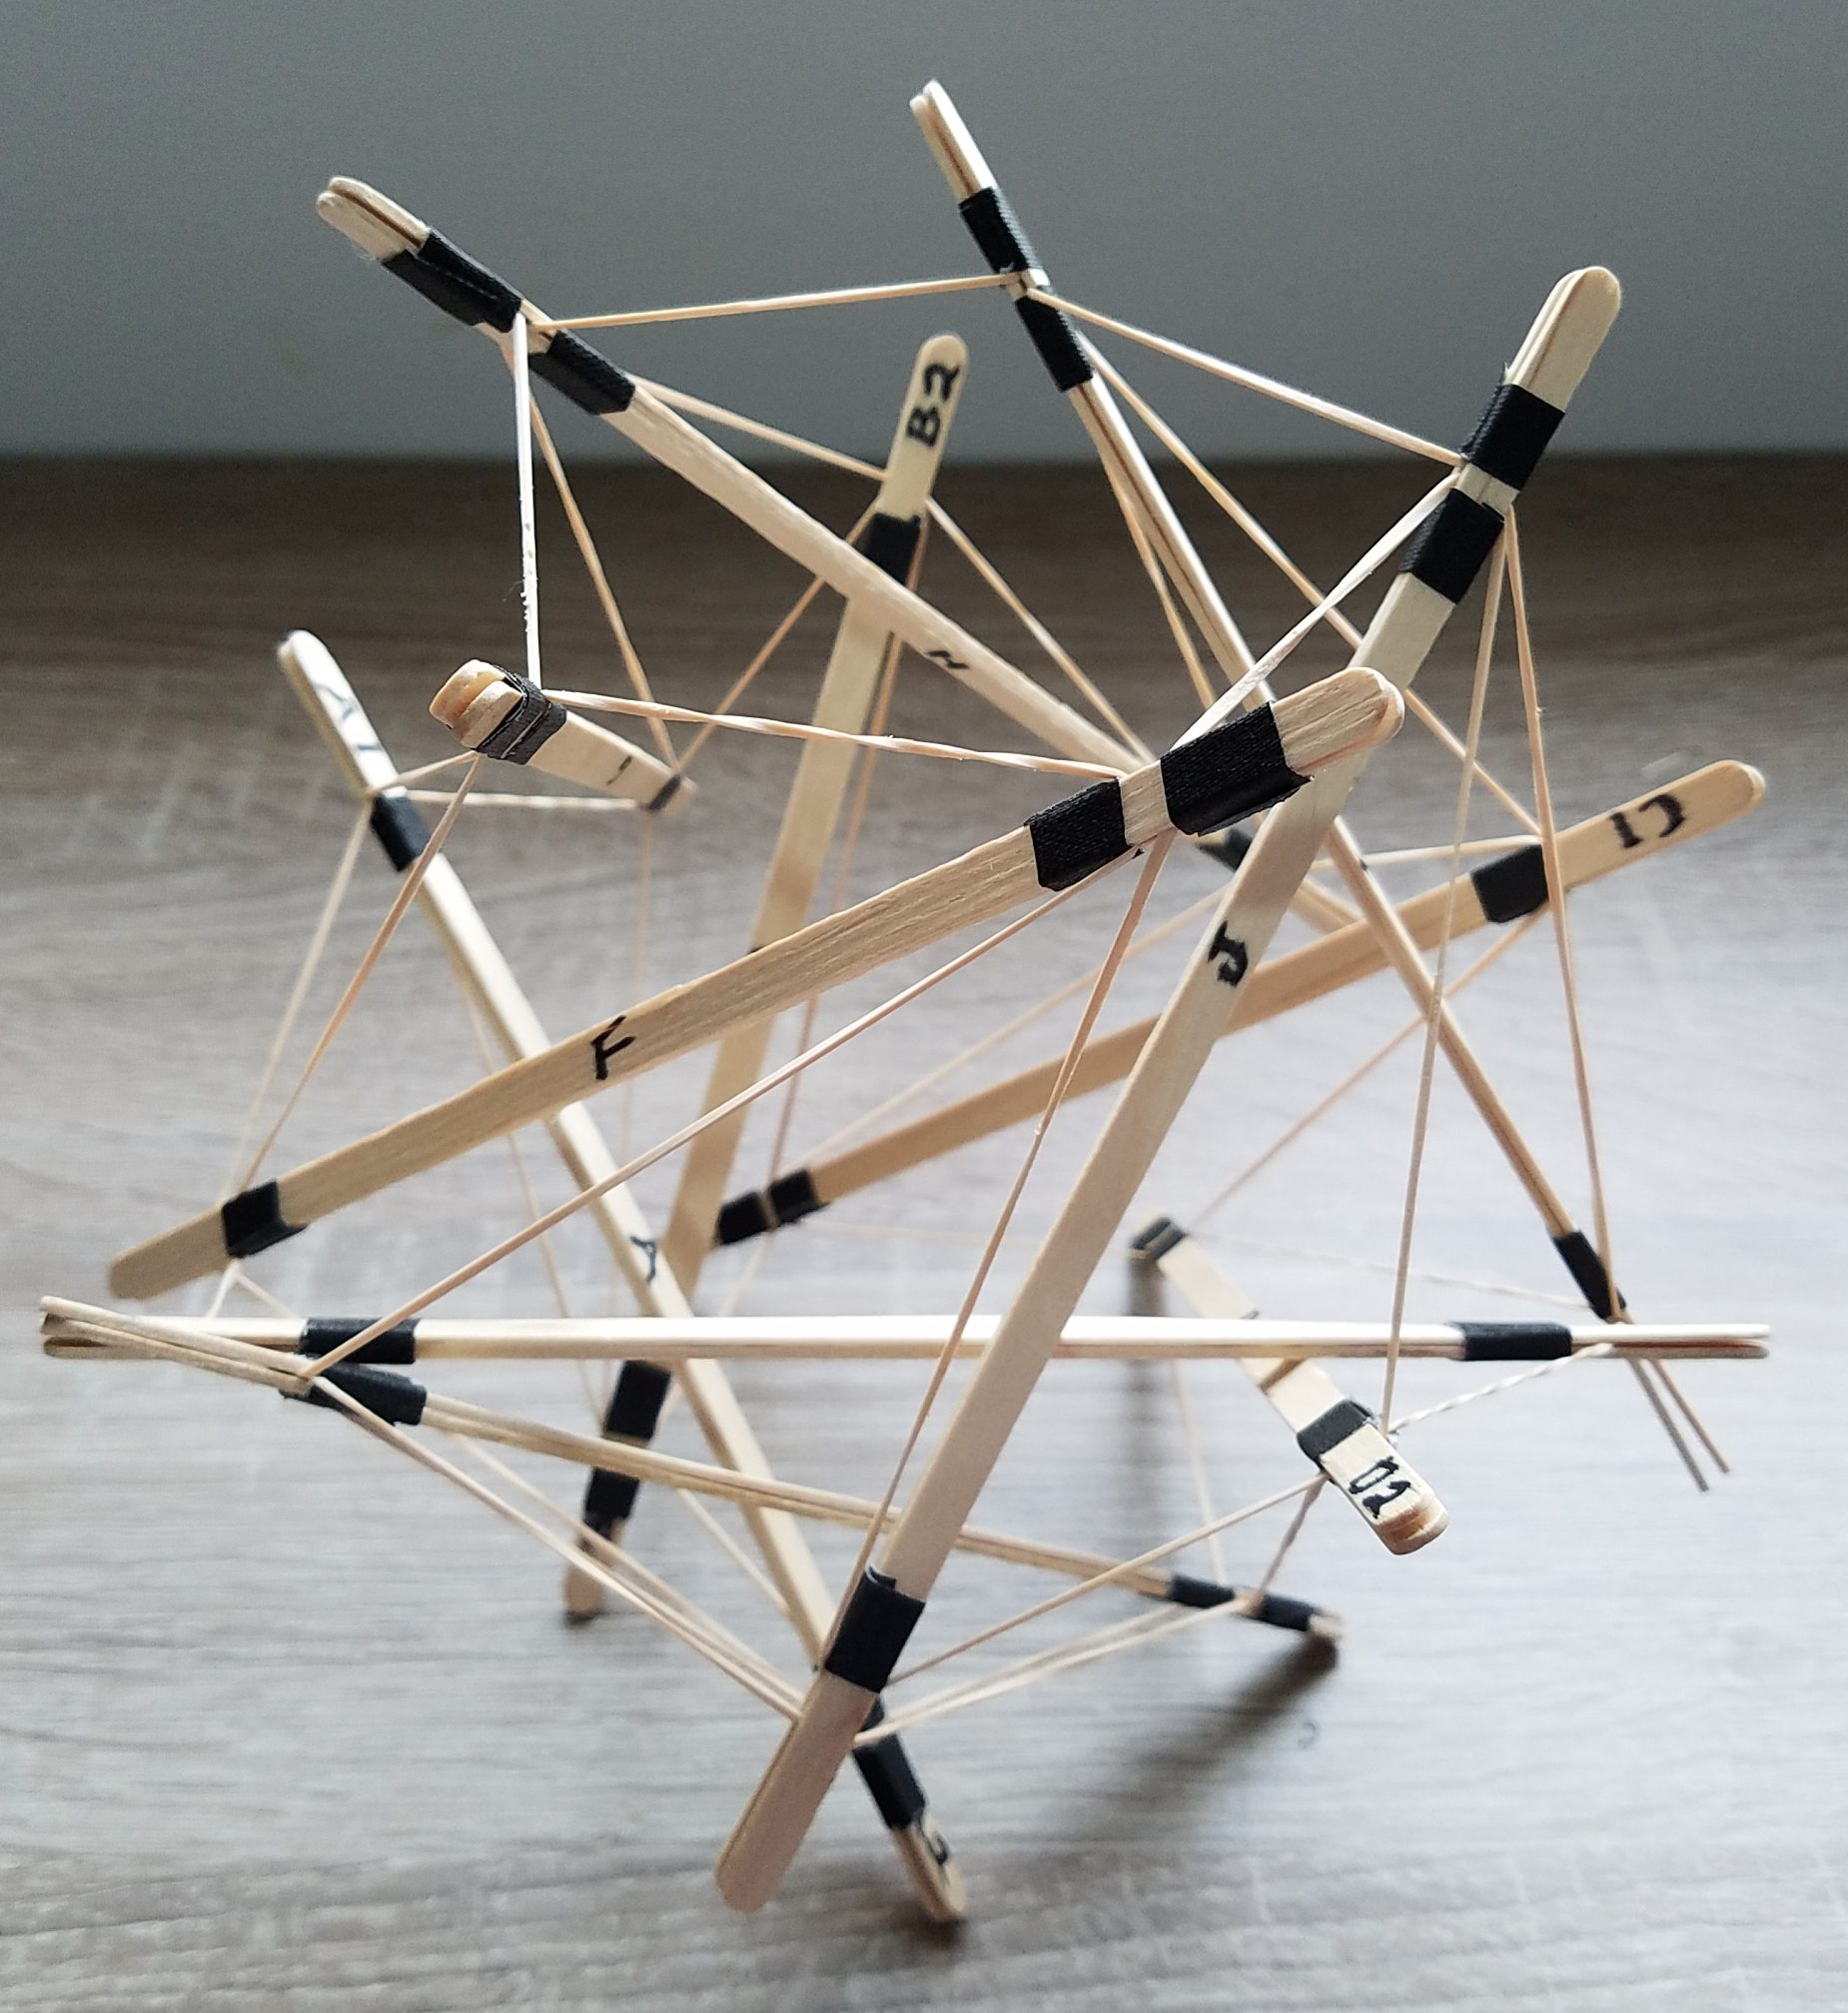 shows the structure with one such “expander” strut in place. The endpoints of the next expander strut will each be two of the zig-zag segments of that equatorial band away from the endpoints of the first, so that the two endpoints of the second strut are also separated by two segments. Continue adding the remaining three struts, proceeding two segments counterclockwise each time. You’ll find that none of the expanders interfere with each other, and each segment of the zig-zag band will receive exactly one connection. When all five of the expanders are in place, you’re done, and the finished tensegrity, dubbed the “icloseidodecahedron,” should look like this.
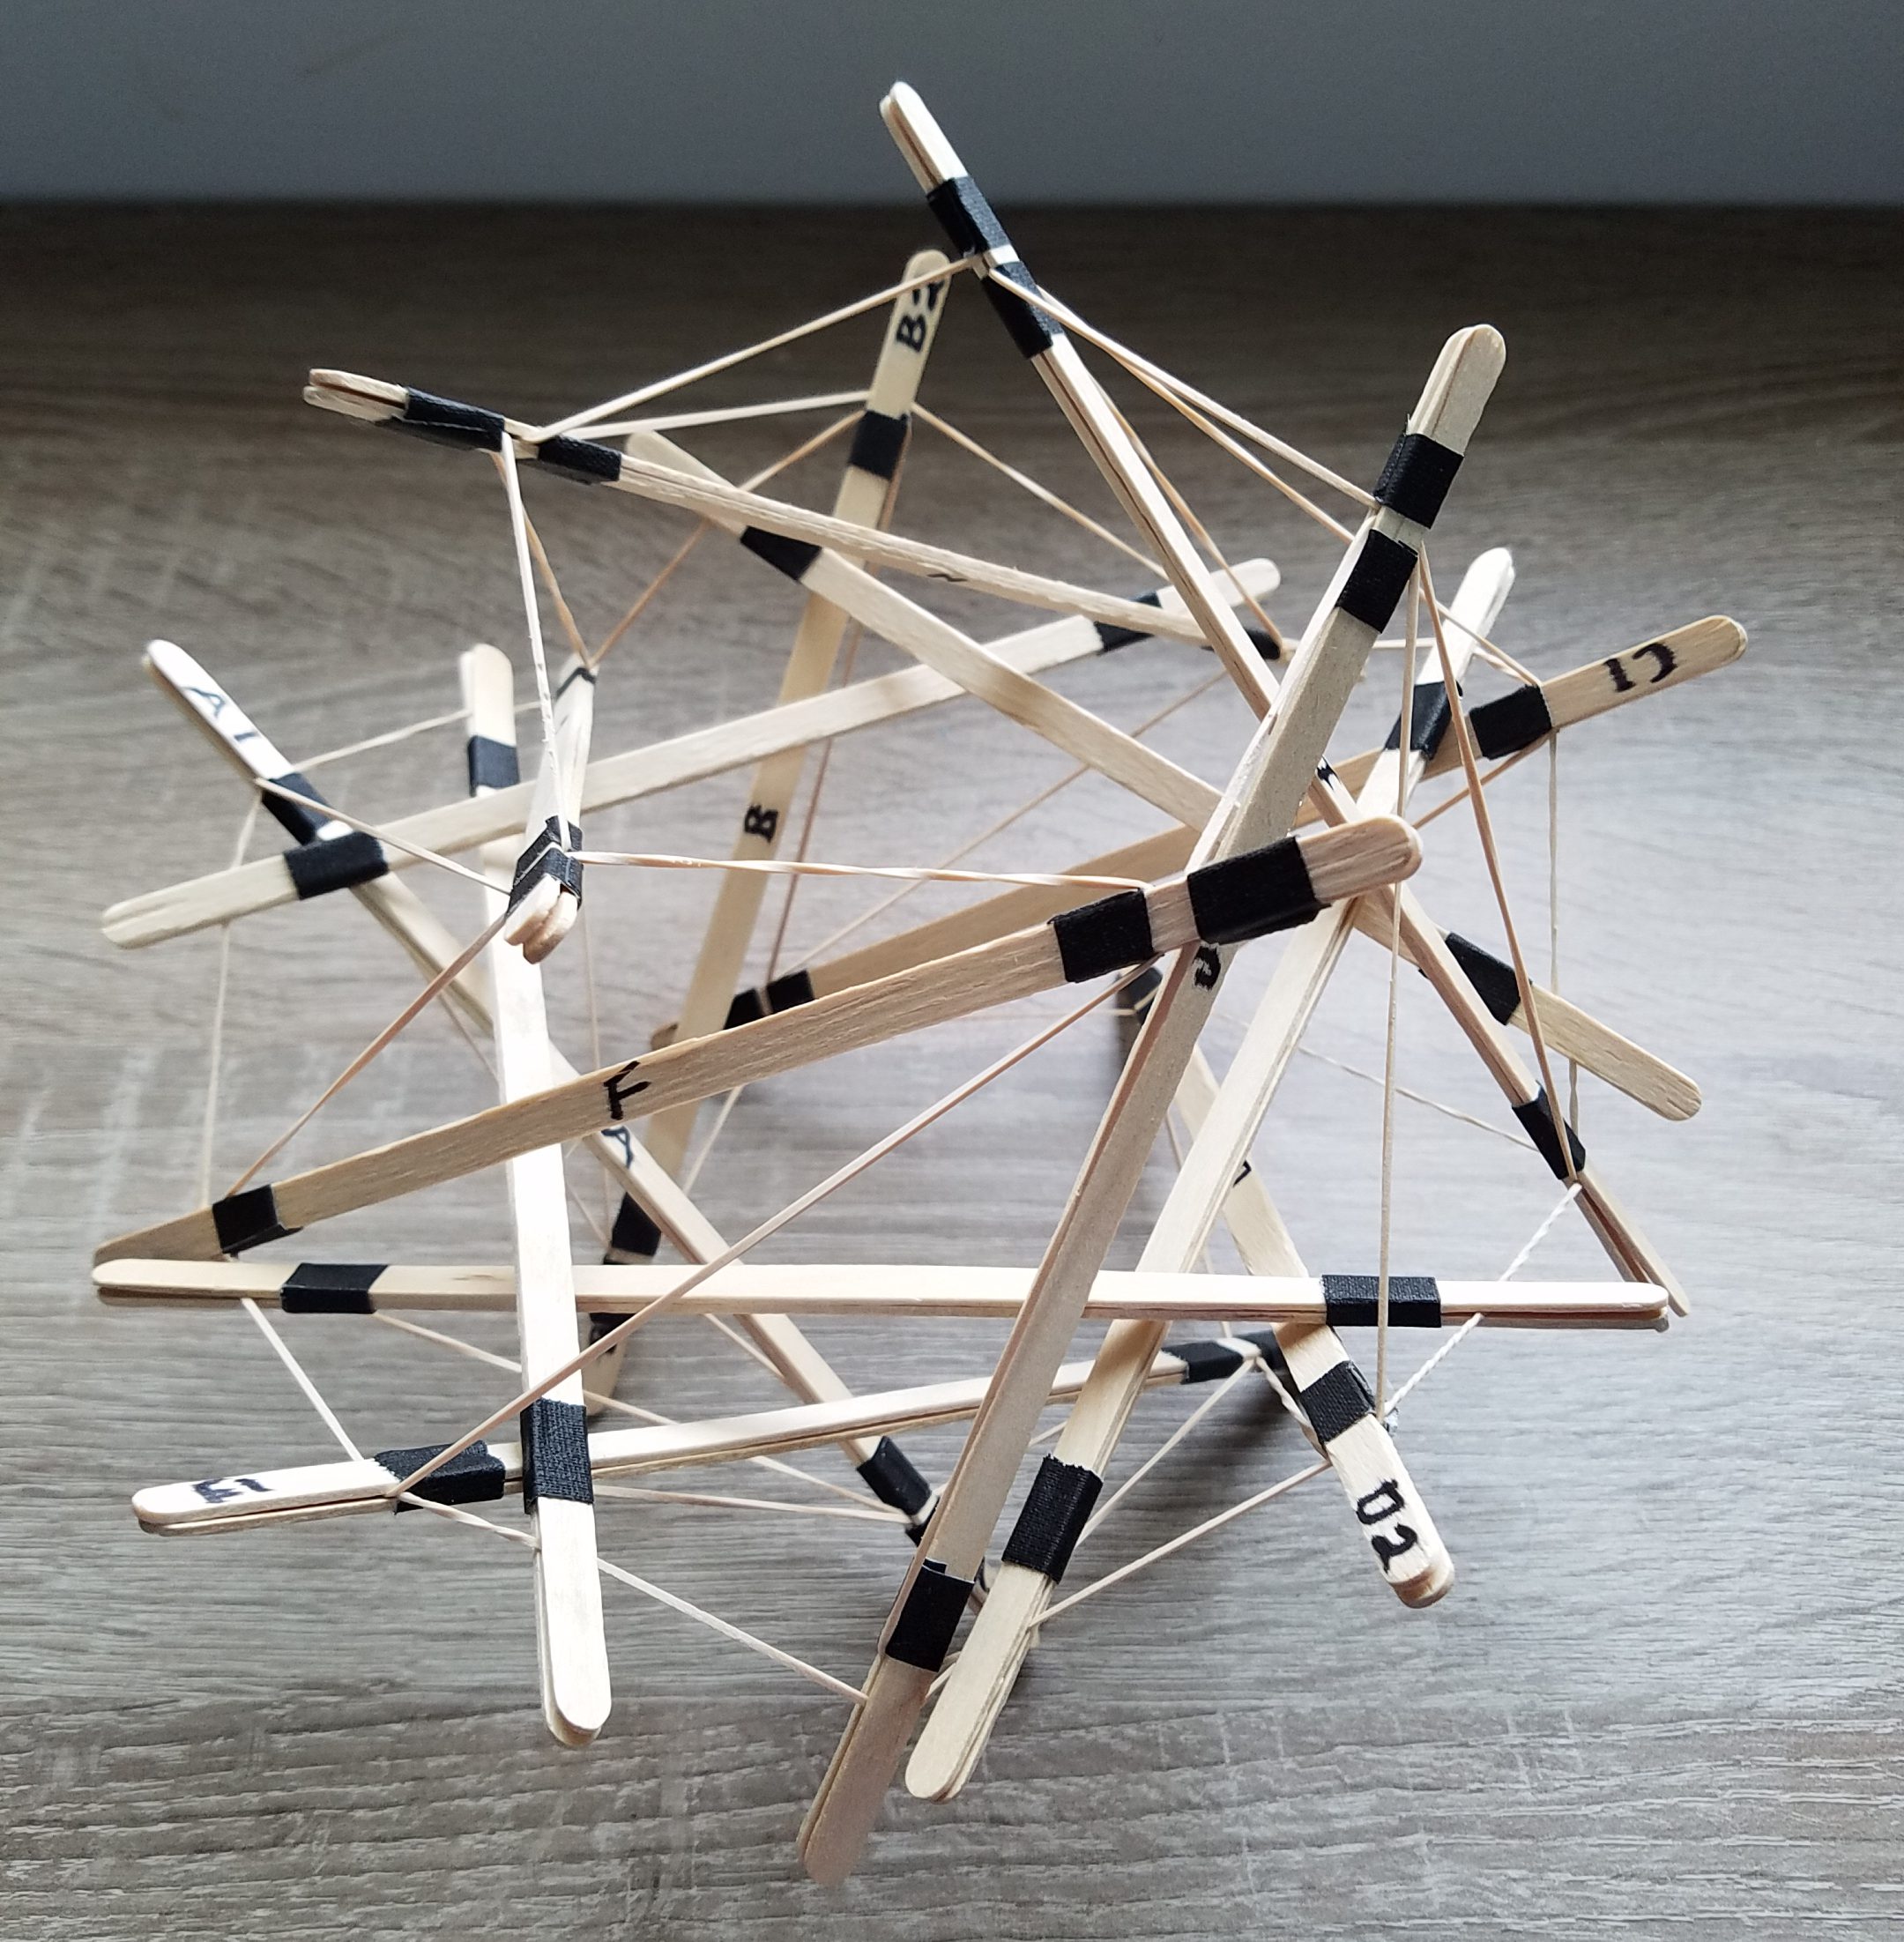
If you look closely, you can see the pentagon of unmarked struts in the middle of the above image. It may not be exactly an icosidodecahedron, but it’s not far off, and the resulting structure has pleasing five-fold symmetry, with a pleasant but not excessive complexity.